Welcome to Rose lighting
Toggle Navigation
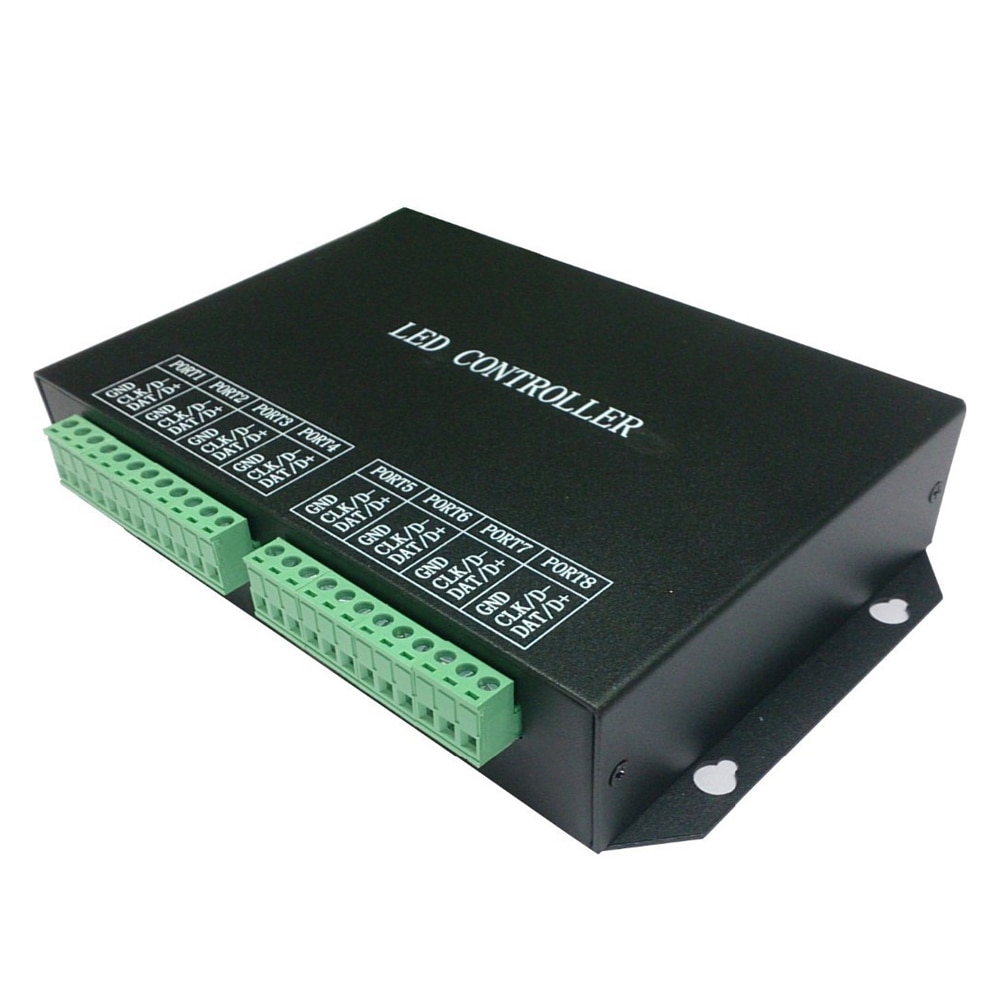
H803TC Master Controller LED Online/Offline Pixel Lights Controller Drive 170000 Pixels Work With H802RA H801RC Slave Controller
Features:
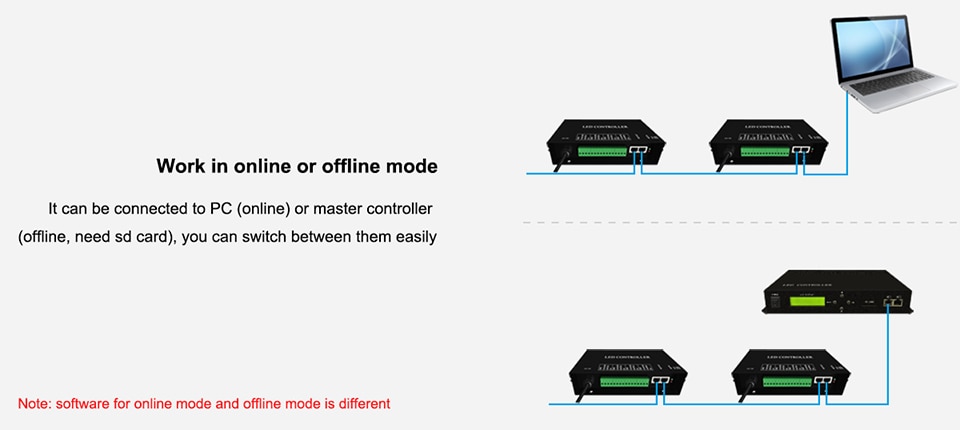
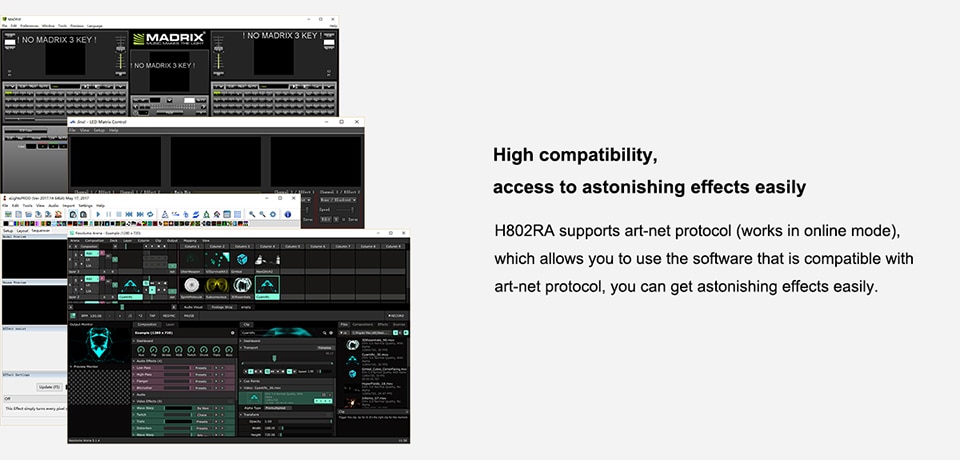
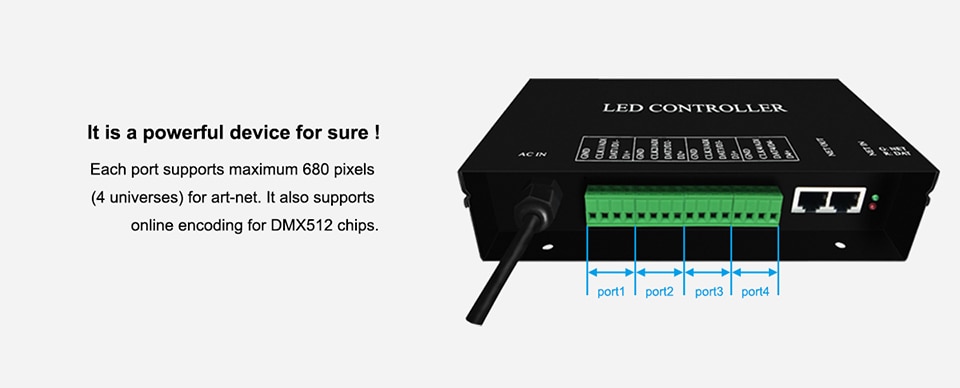
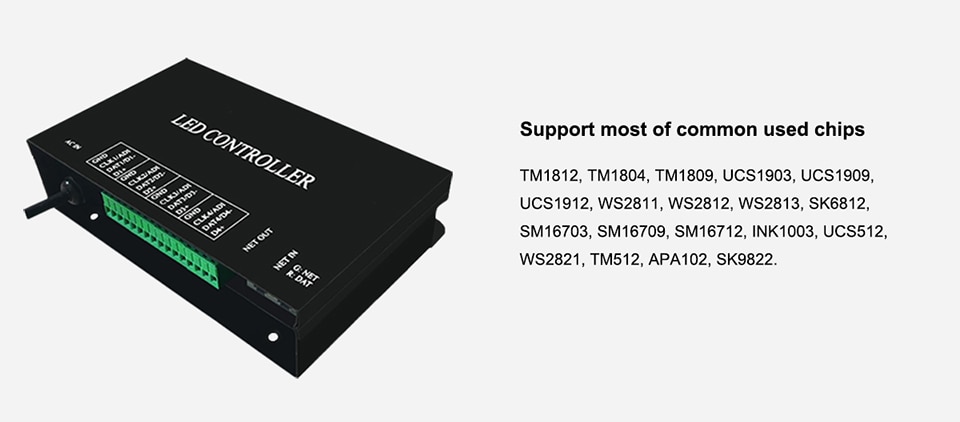
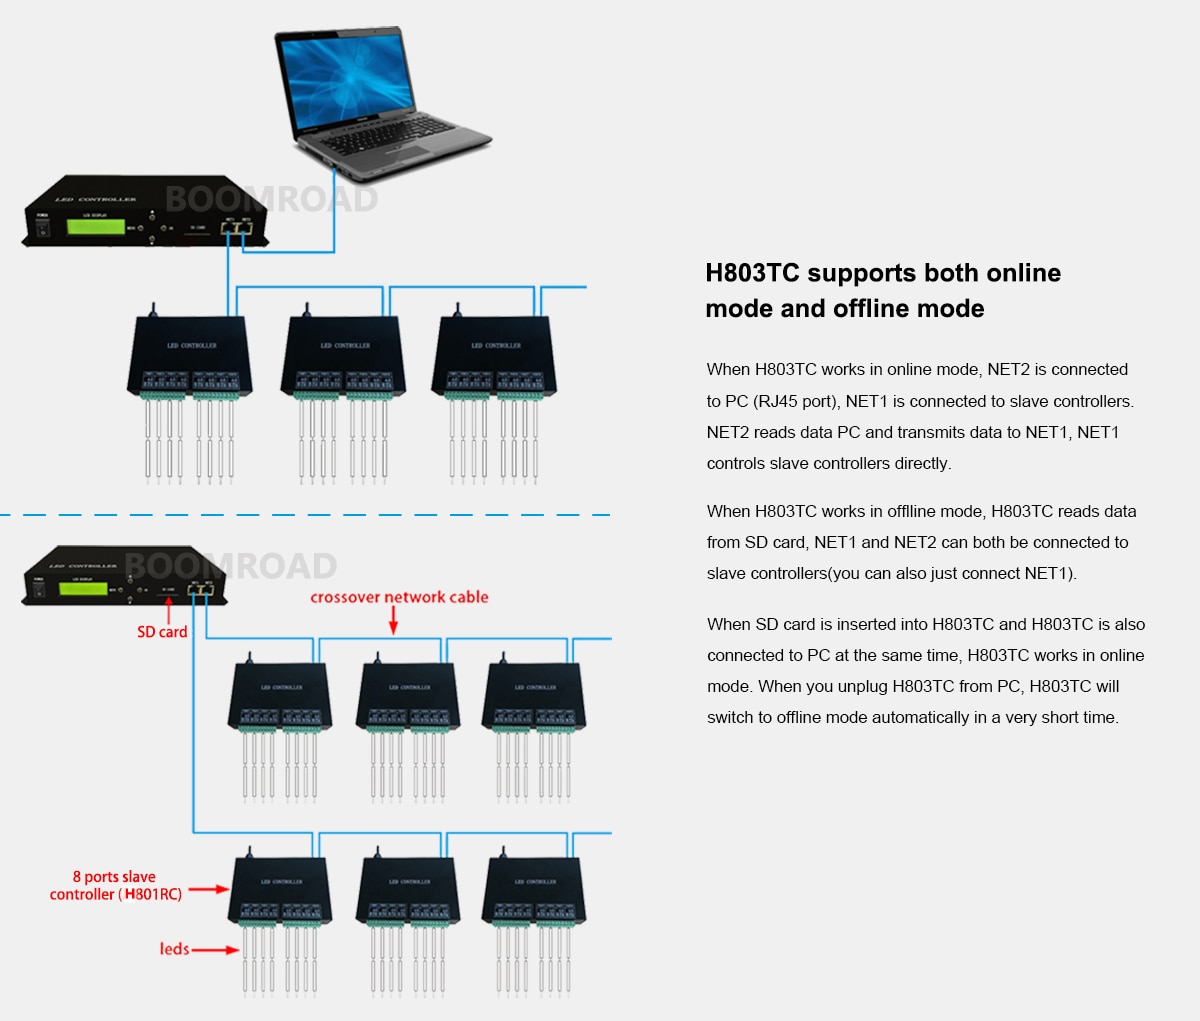
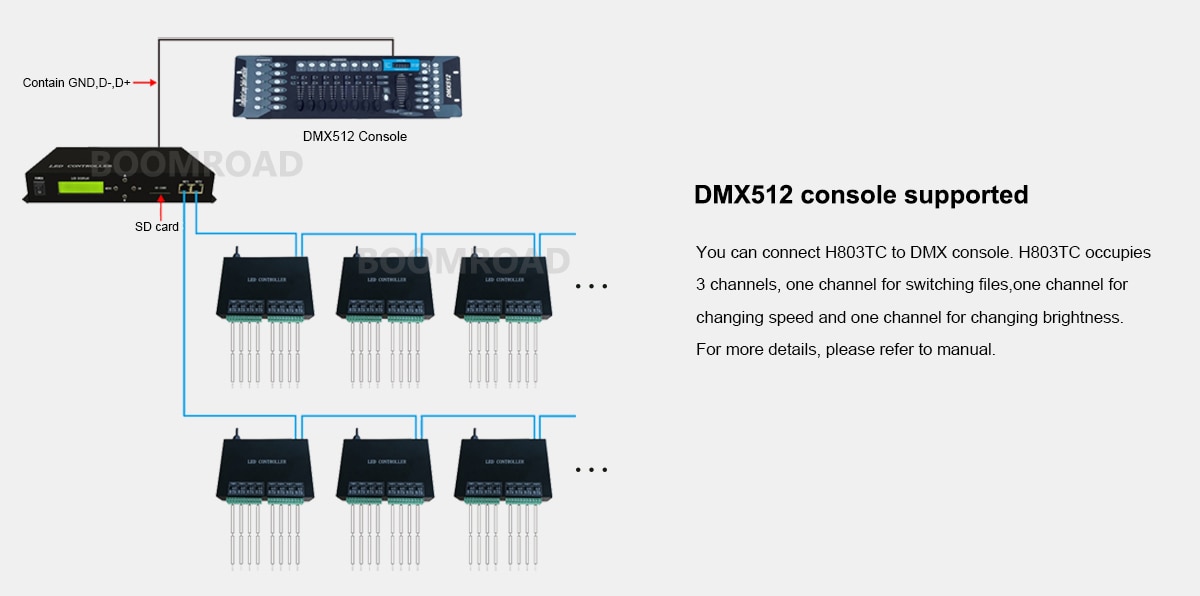
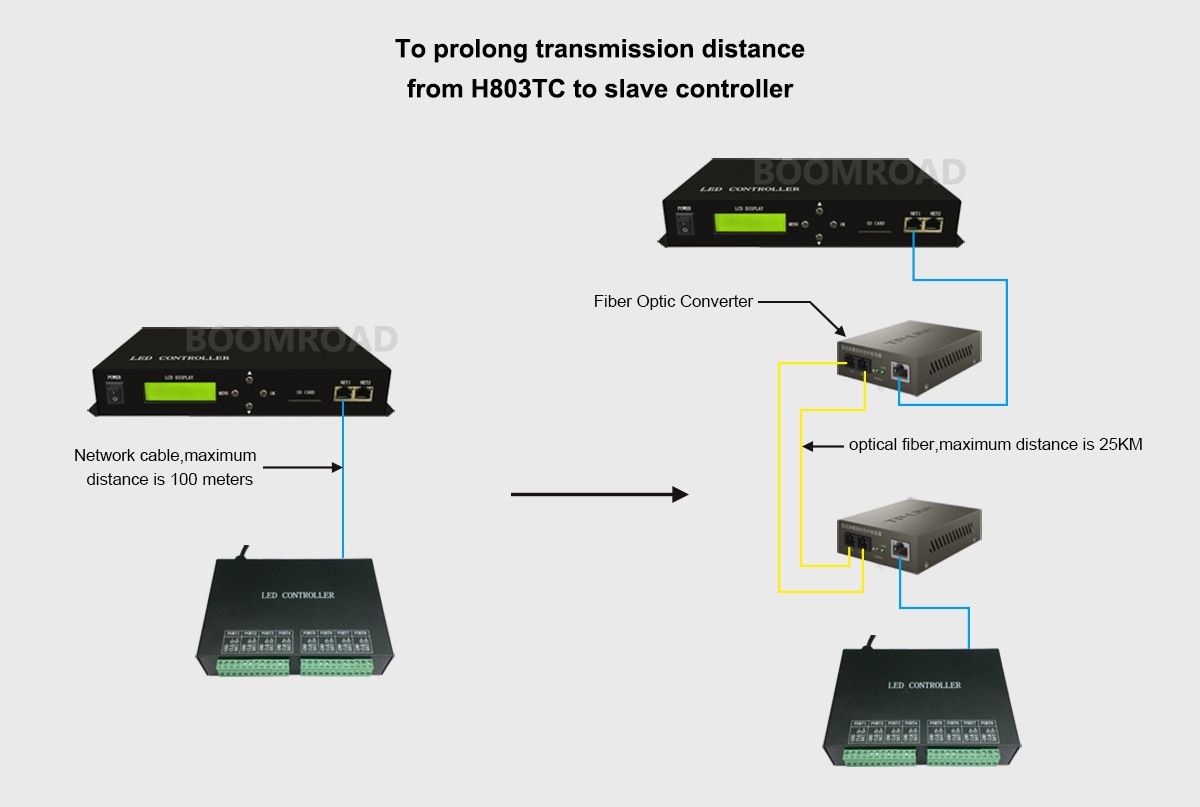
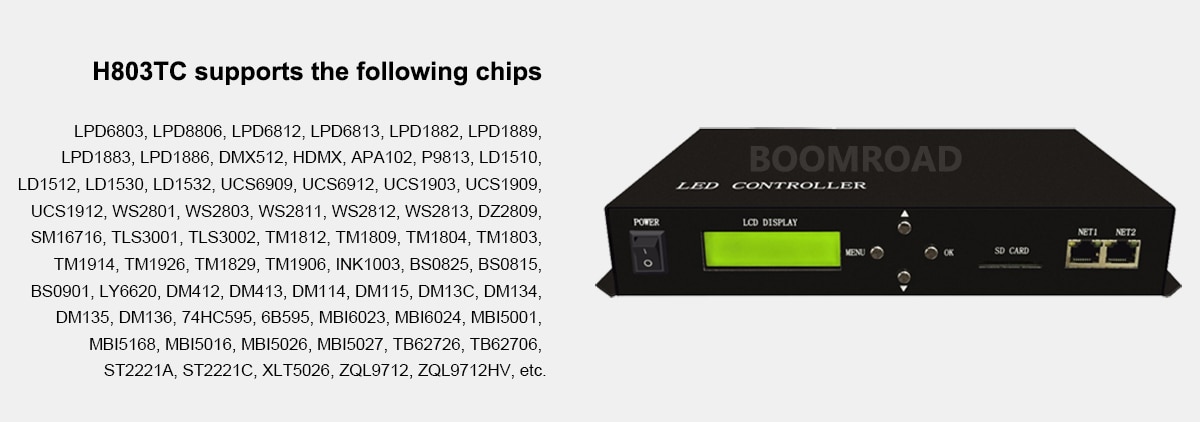
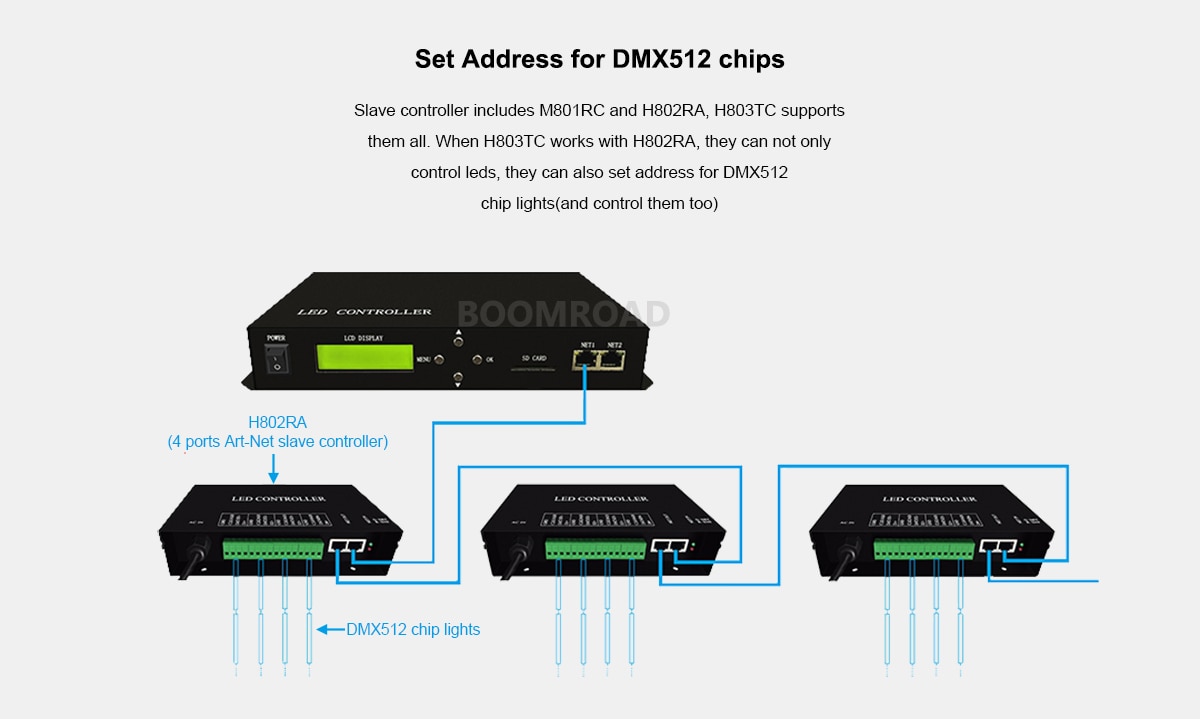
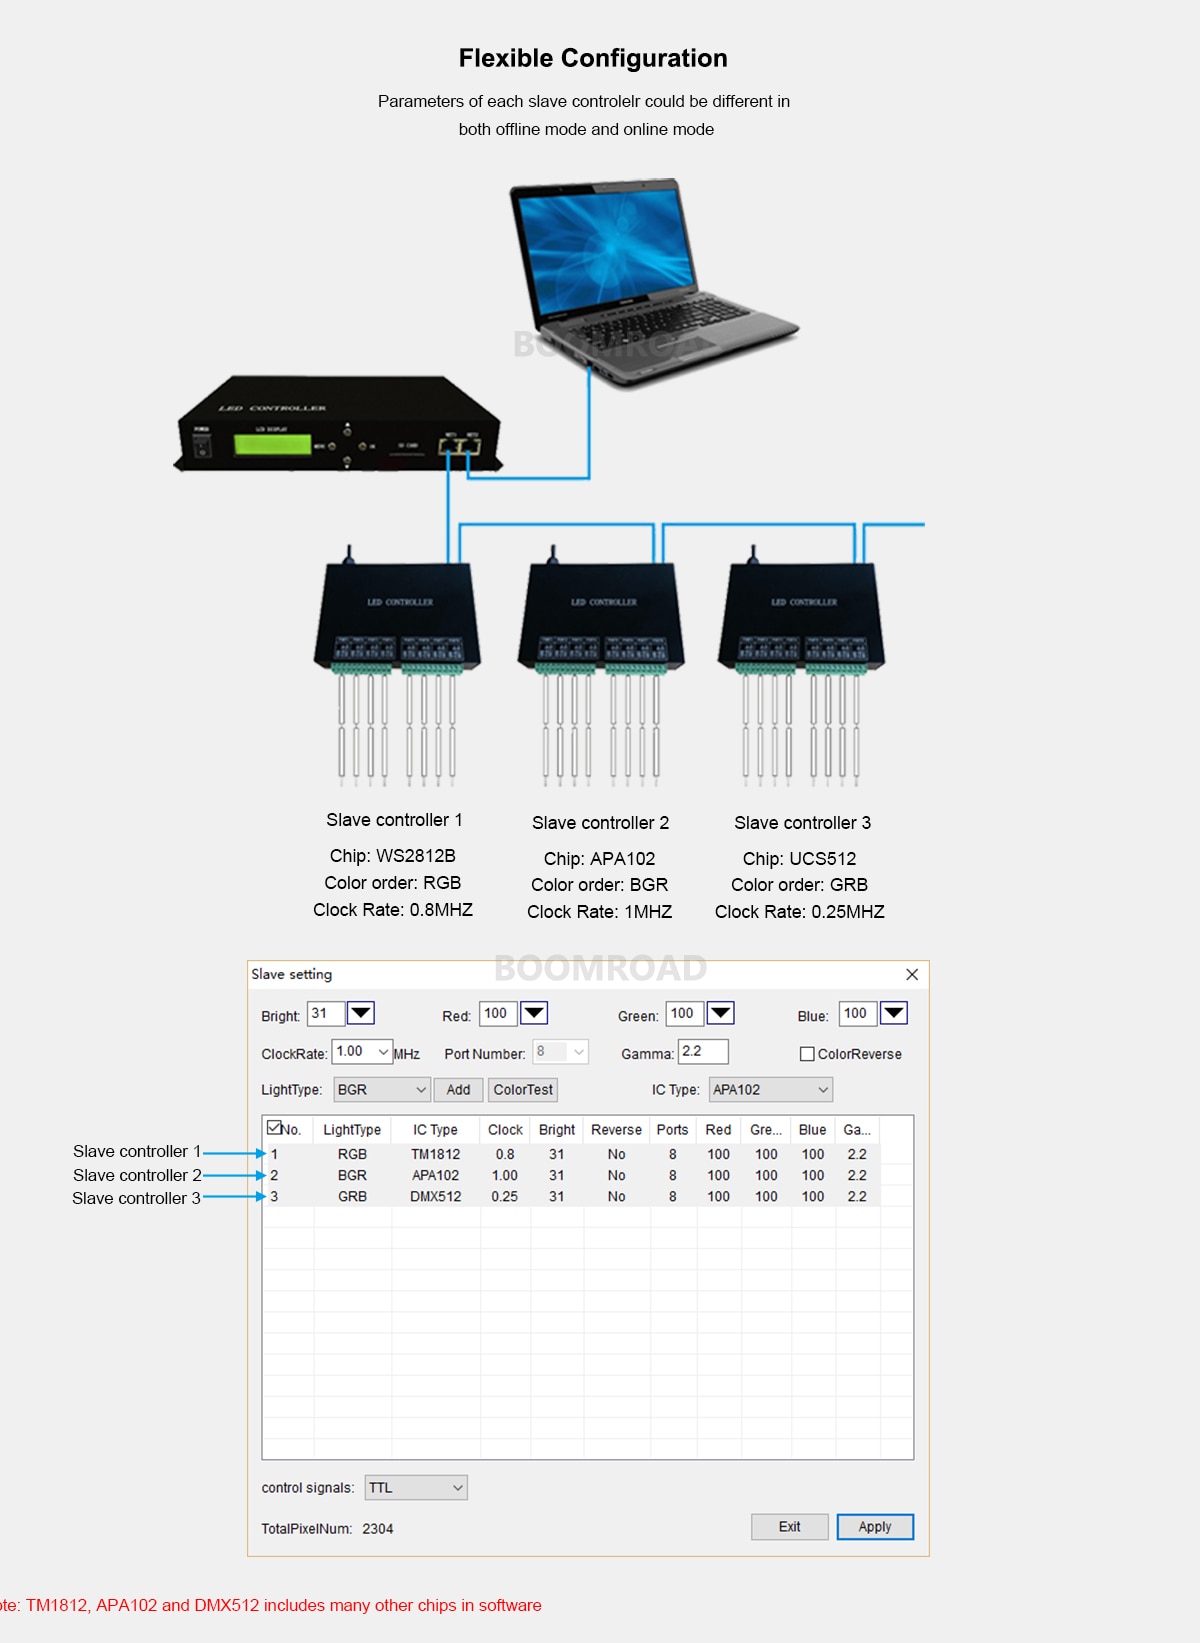
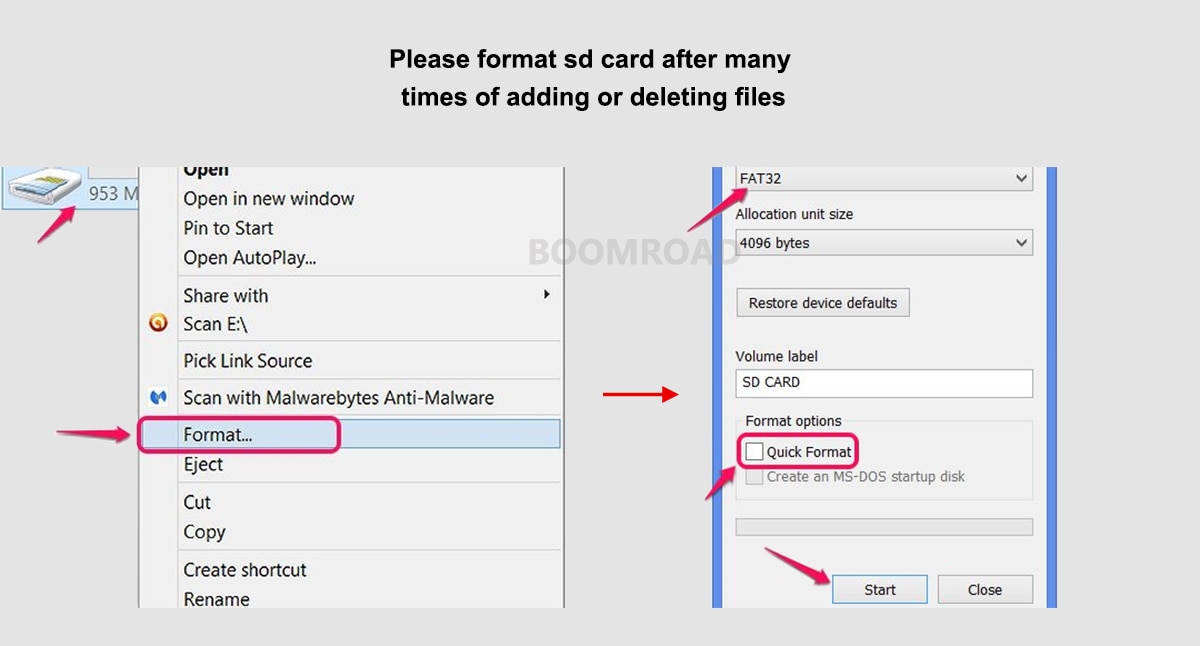
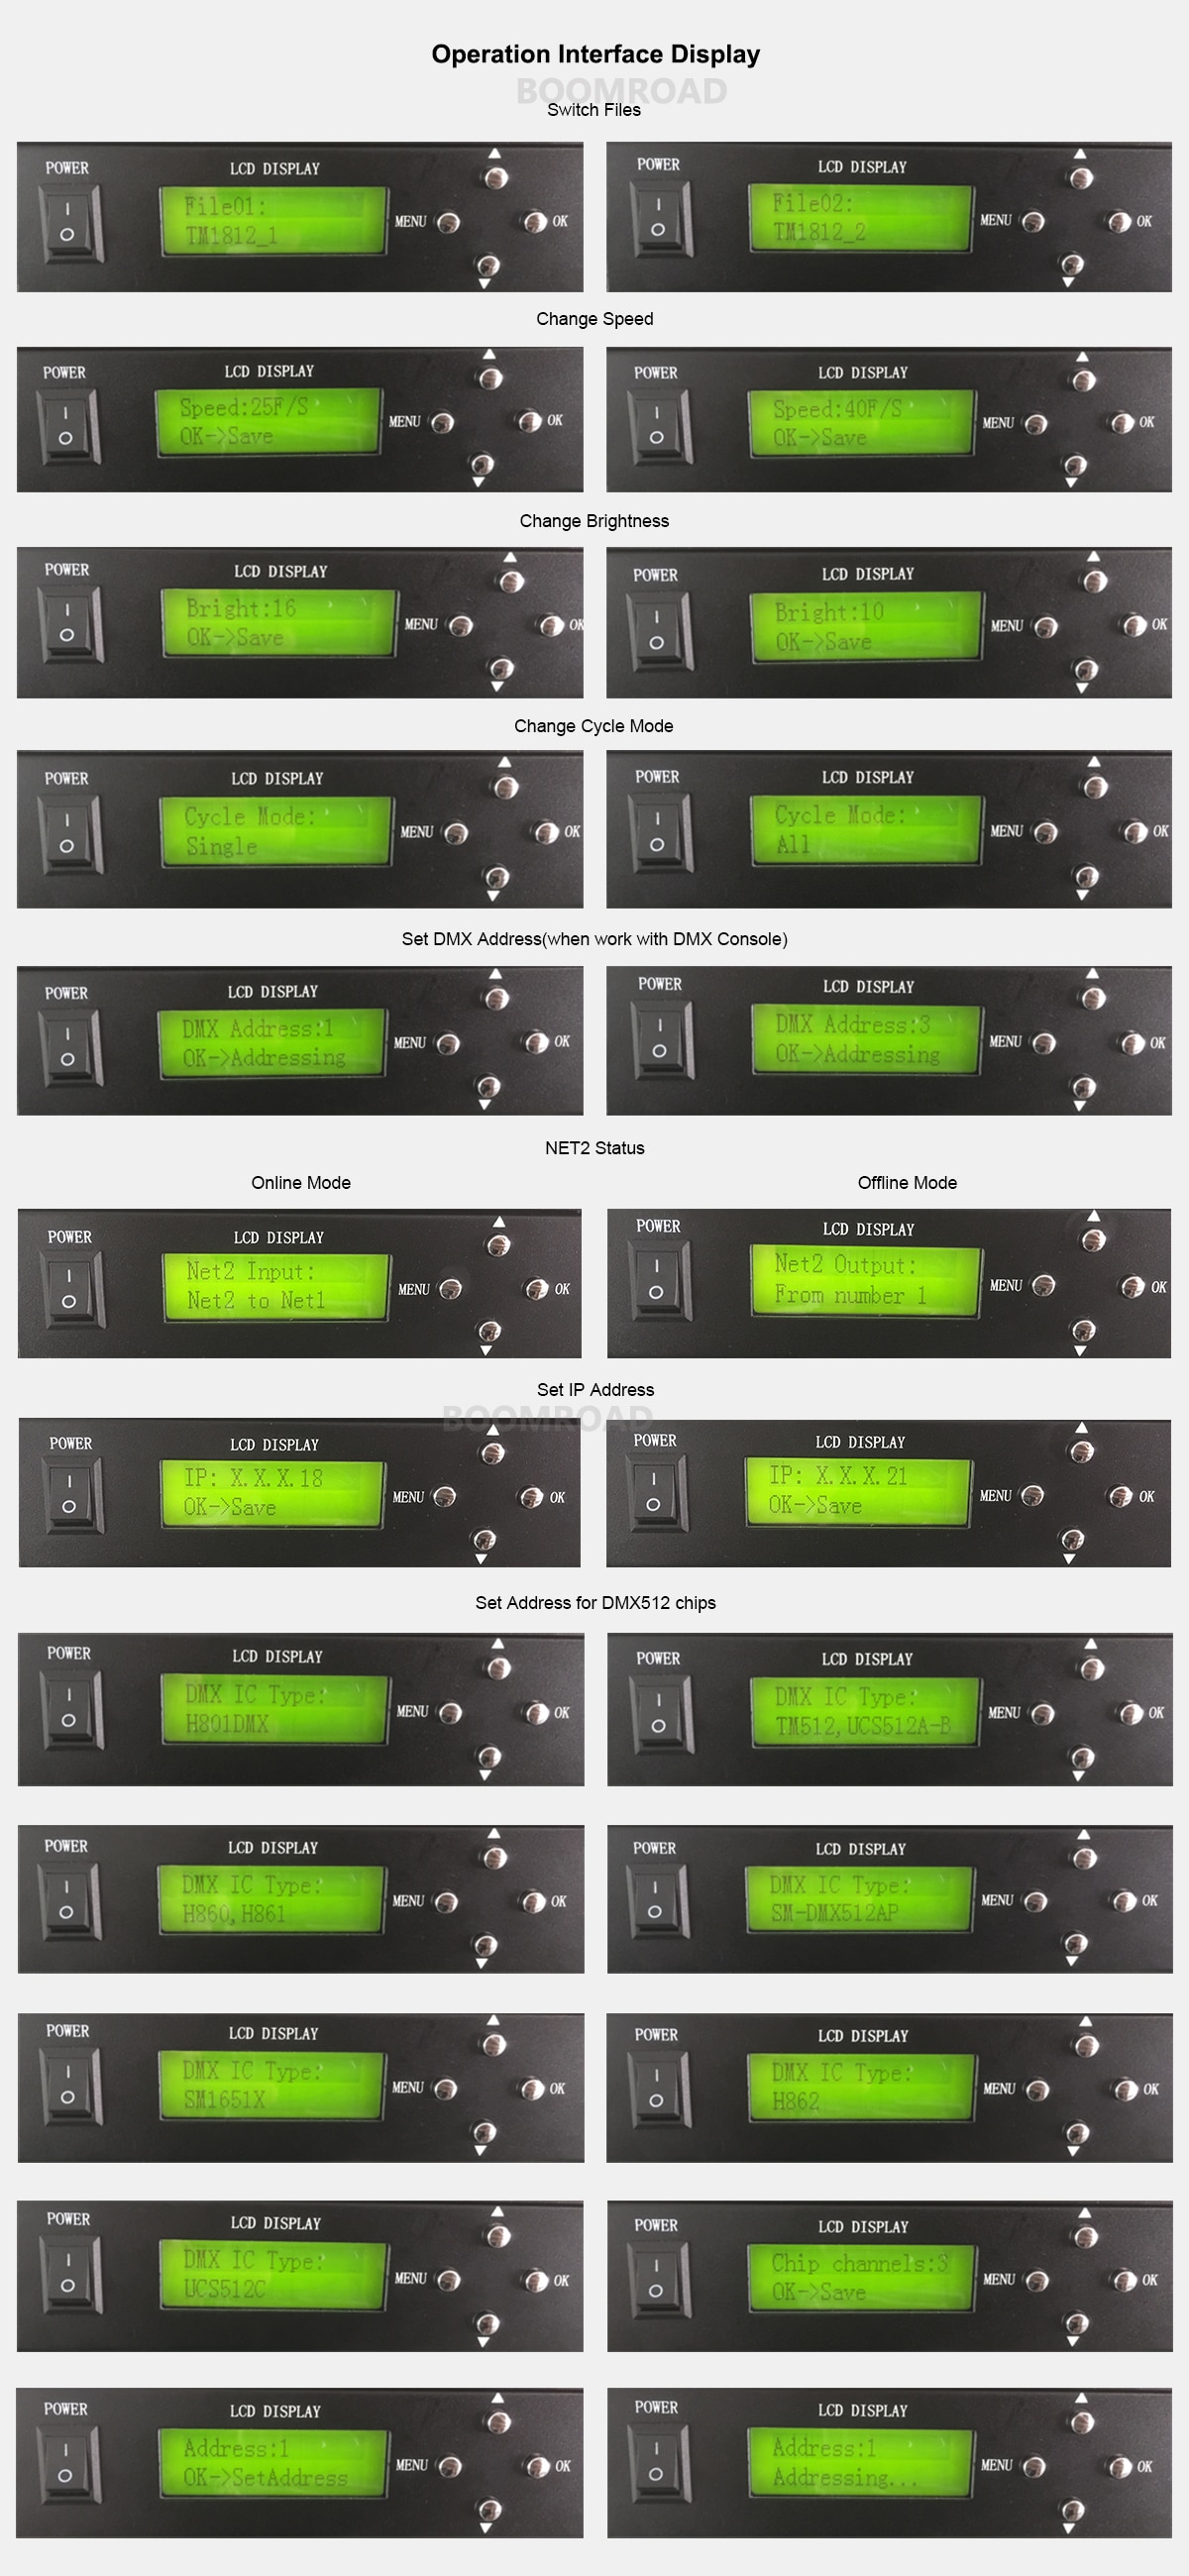
(1). H803TC can work with PC(online mode), SD card(offline mode) or DMX console. (2). H803TC drives maximum 170000 pixels, 2 ports control maximum 255 slave controllers. (3). Slave controllers include H802RA and H801RC. (4). You can set address for DMX512 chips with H803TC. (5). H803TC transmits data based on Ethernet Protocol. (6). Use four buttons or PC to switch files, set play mode, speed and brightness. (7). SD card supports FAT32, FAT16 format, maximum capacity is 64G bytes, stores up to 64 DAT files.
LED Studio download link:
https://www.rose-light.com/?list_38/
LED Build Software Download Link:
https://www.rose-light.com/?list_38/
LED Build Software Tutorial Video(especially for H803TC):
Download the detailed specification here please
Product Display
Use Manual
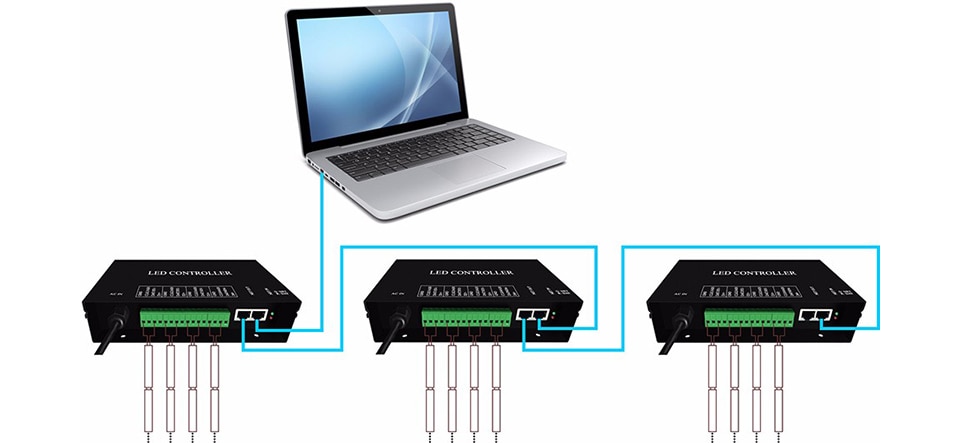
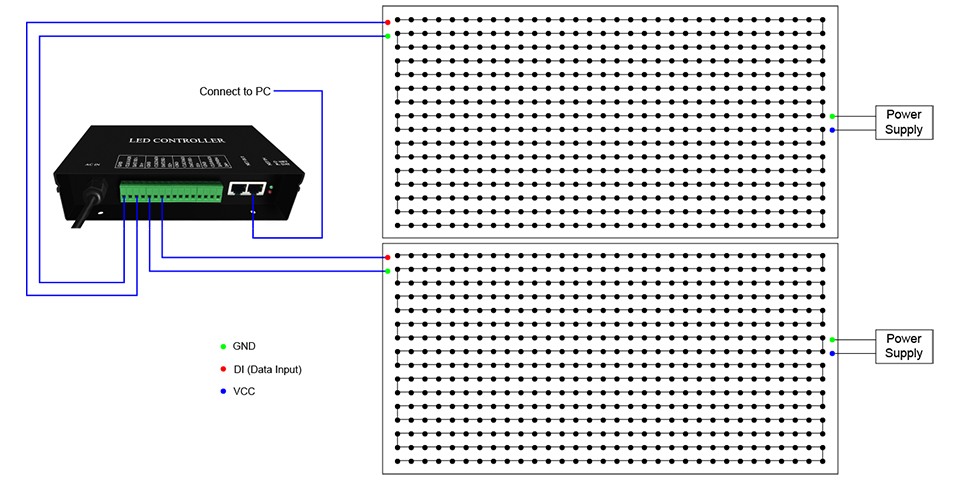
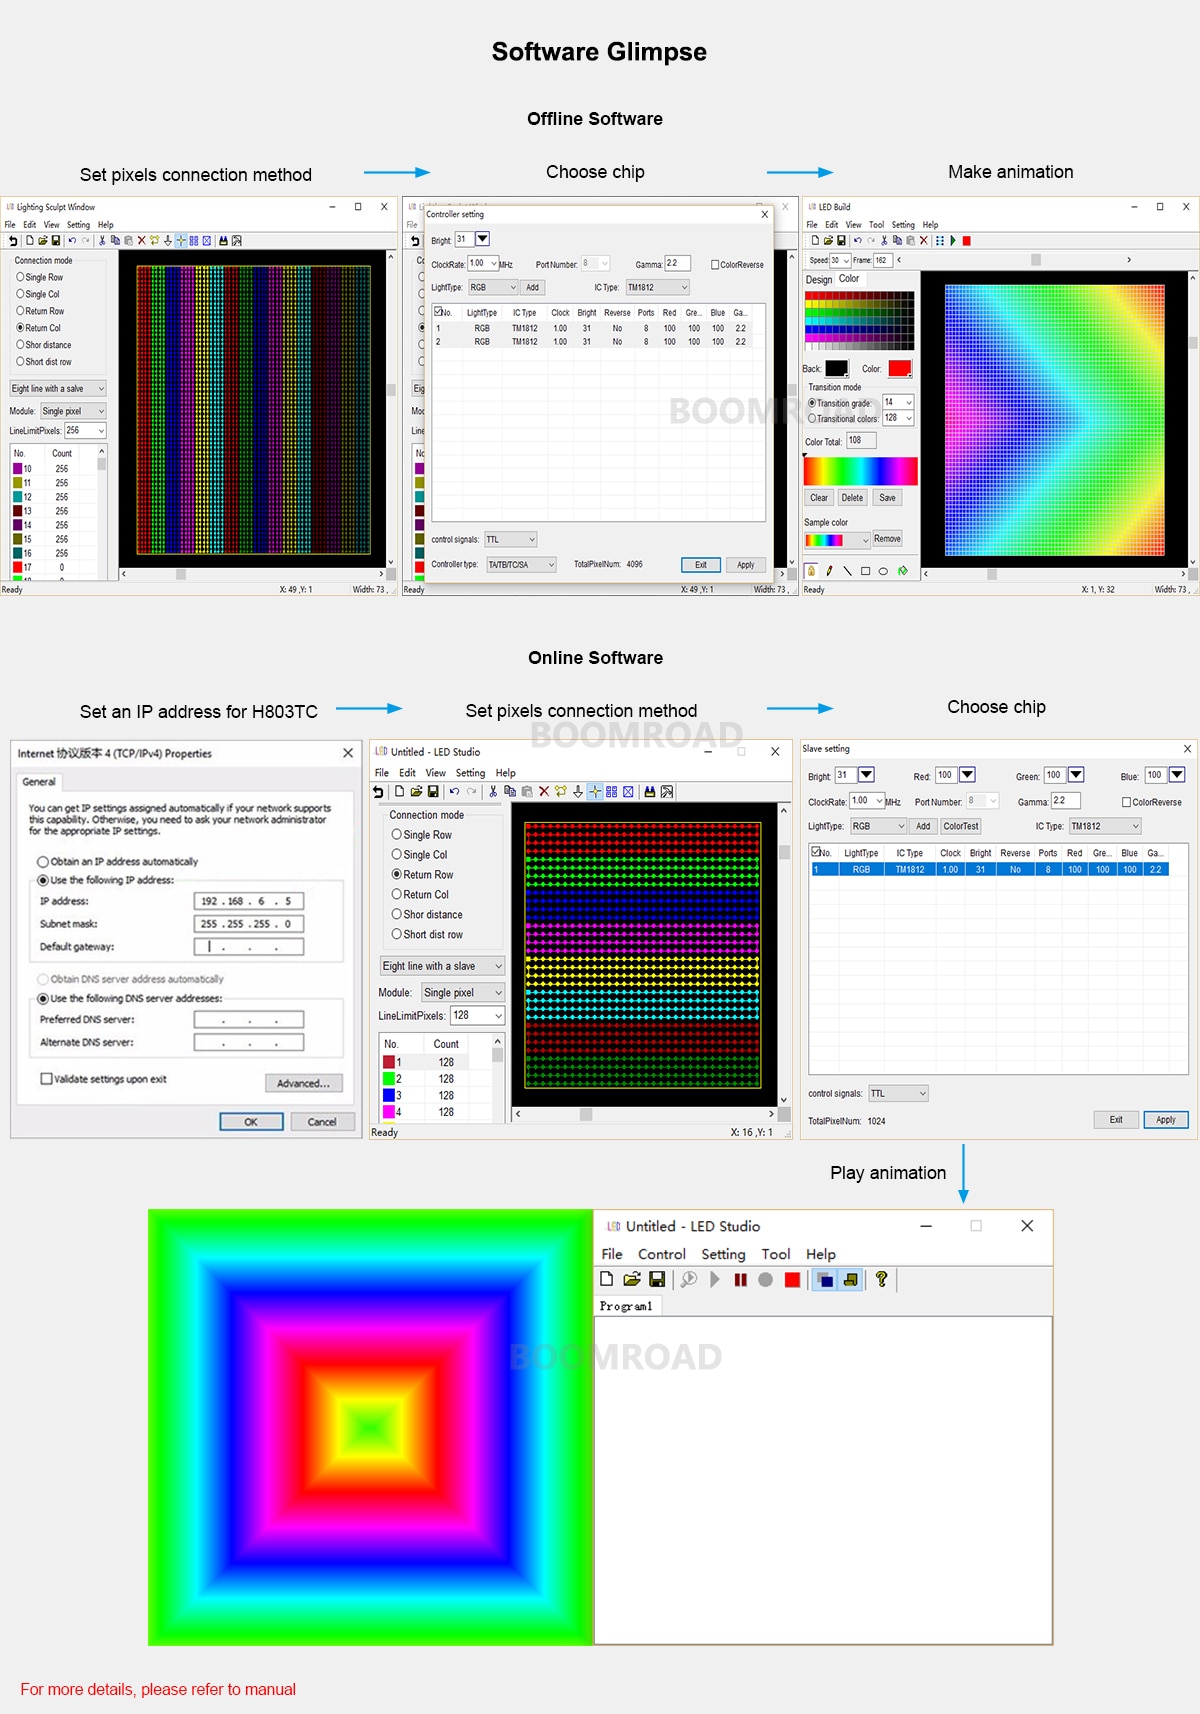
Step1. Connect H802RA to PC and led lights to H802RA like the following image displays (It's online mode)
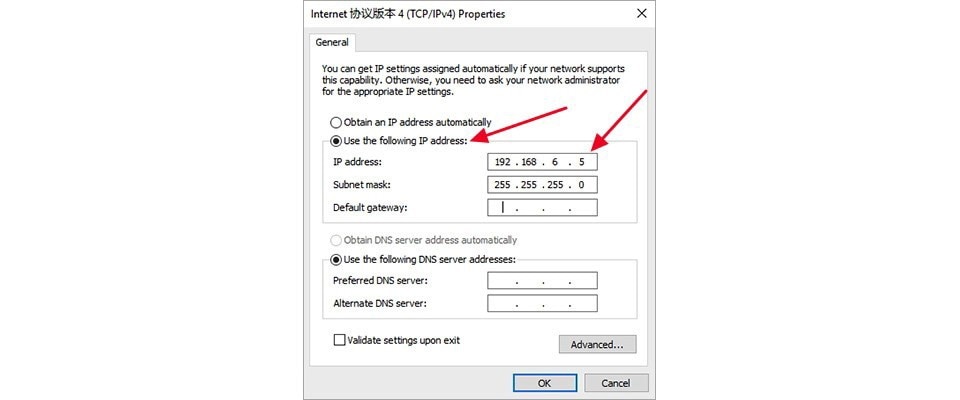
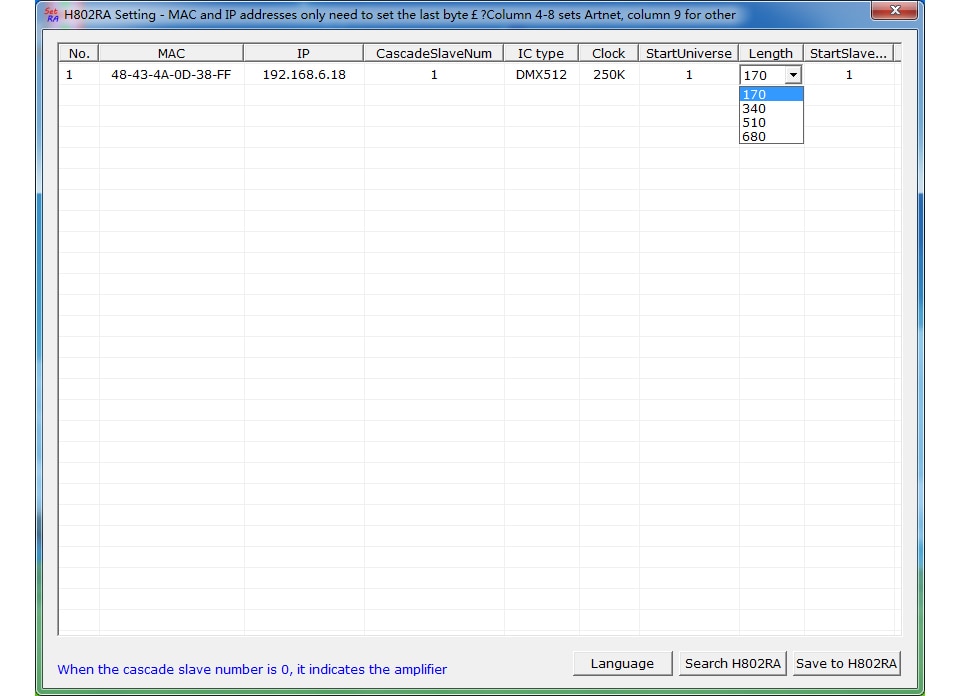
Step2. Set an IP address for H802RA
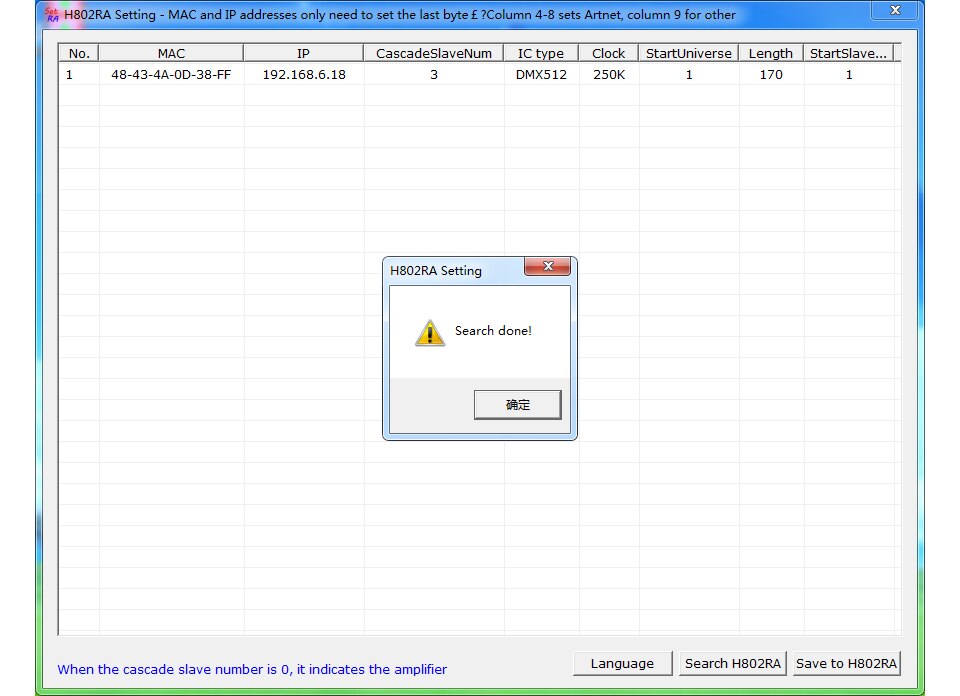
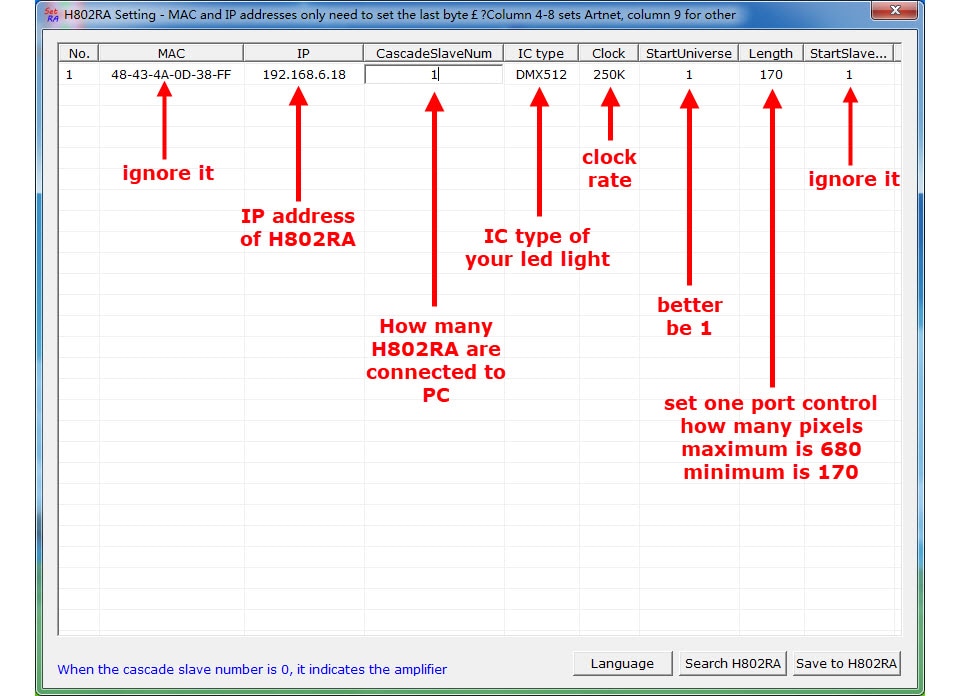
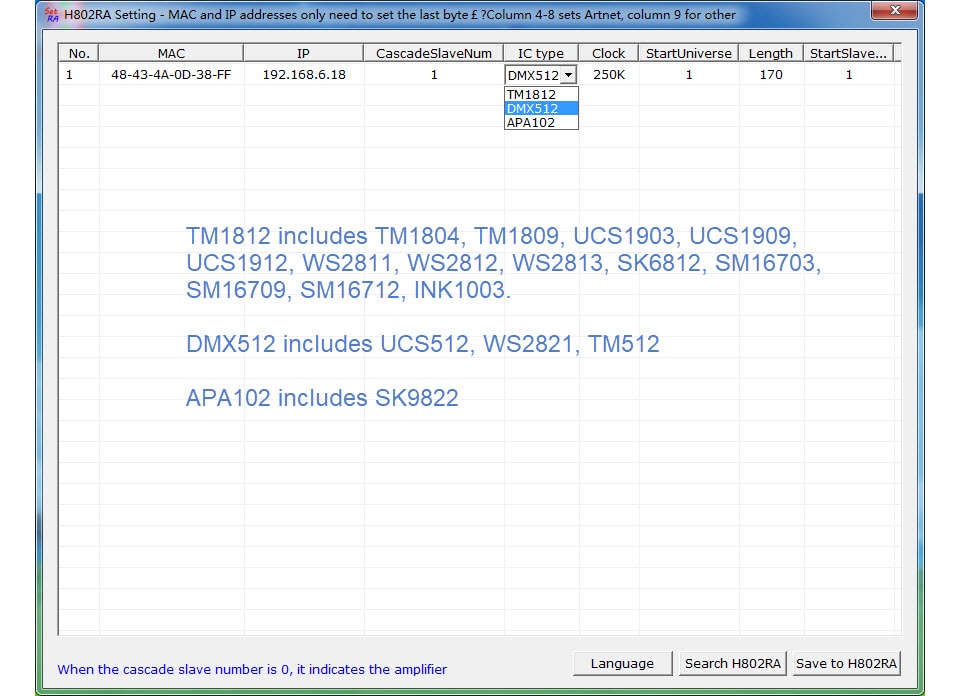
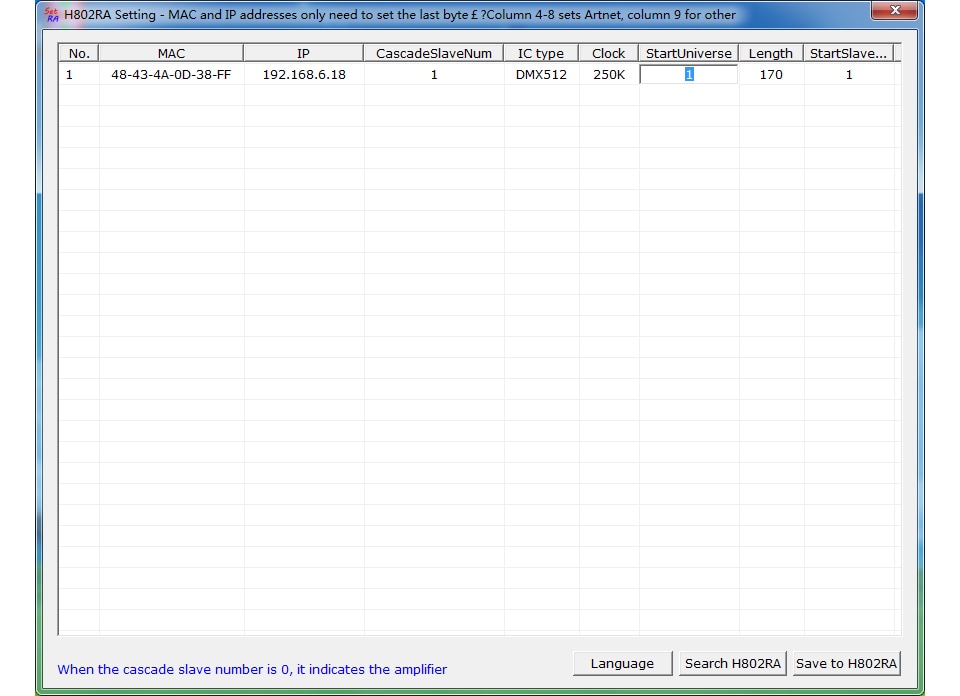
Step3. Configure H802RA
Download Led Studio
Led Studio Download Link: https://drive.google.com/open?id=1-155tBpTSGeAtOpD7d6StCYcLSYBJgPO
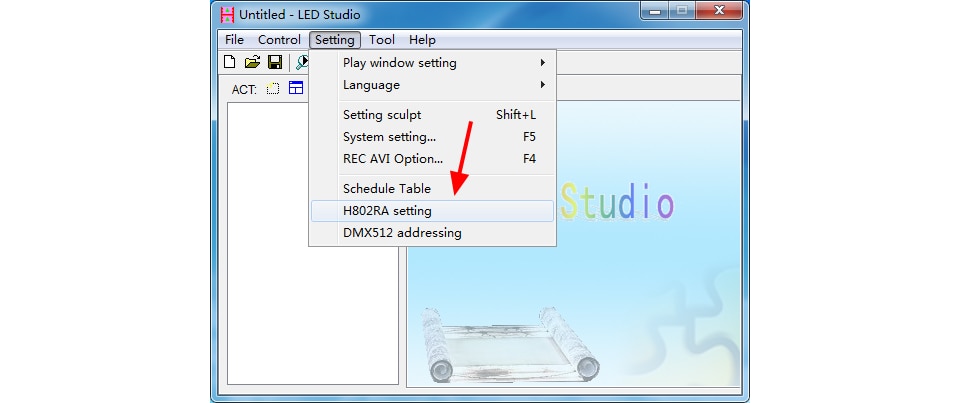
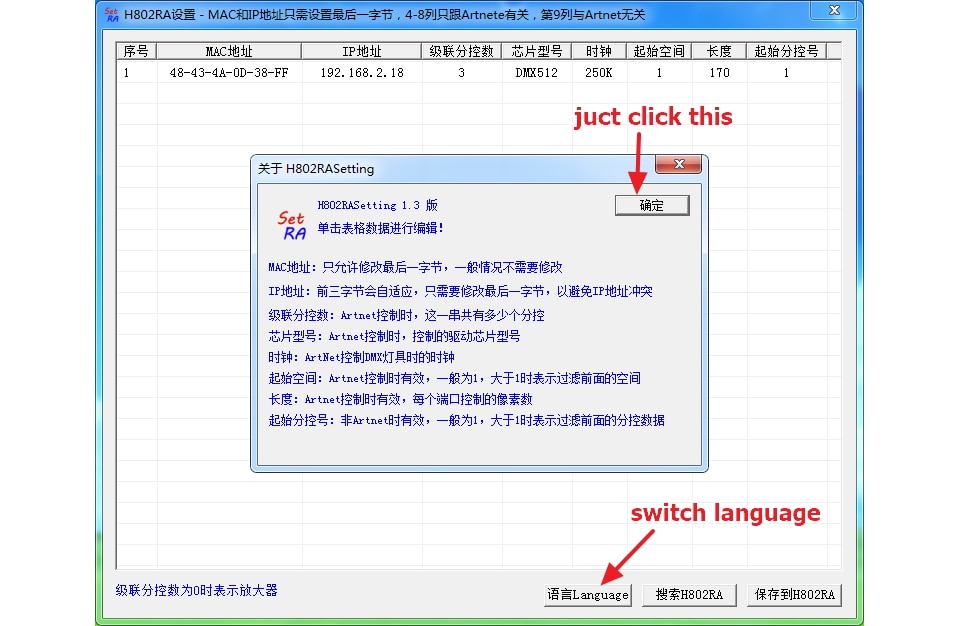
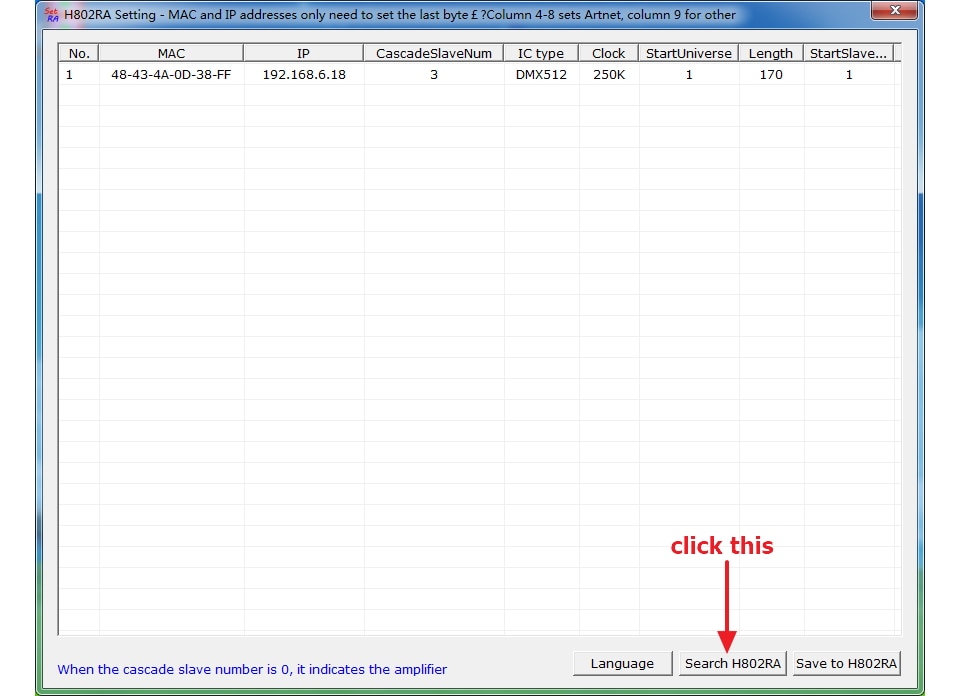
The panel consists of 2 pcs 32*16 panels
H803TC Master Controller LED Online/Offline Pixel Lights Controller Drive 170000 Pixels Work With H802RA H801RC Slave Controller
Features:
(1). H803TC can work with PC(online mode), SD card(offline mode) or DMX console. (2). H803TC drives maximum 170000 pixels, 2 ports control maximum 255 slave controllers. (3). Slave controllers include H802RA and H801RC. (4). You can set address for DMX512 chips with H803TC. (5). H803TC transmits data based on Ethernet Protocol. (6). Use four buttons or PC to switch files, set play mode, speed and brightness. (7). SD card supports FAT32, FAT16 format, maximum capacity is 64G bytes, stores up to 64 DAT files.
LED Studio download link:
https://drive.google.com/open?id=1ZGqPM7_kZj68LsAZMEL-NeiDO7B9Sbqe
LED Build Software Download Link:
https://drive.google.com/open?id=1DUF7TwbdJ-k_RLnPPTMX3rhHBc1x6EYA
LED Build Software Tutorial Video(especially for H803TC):
https://drive.google.com/open?id=1scuoAgFEXGQSubIM6dblVSMdj20xuBy7
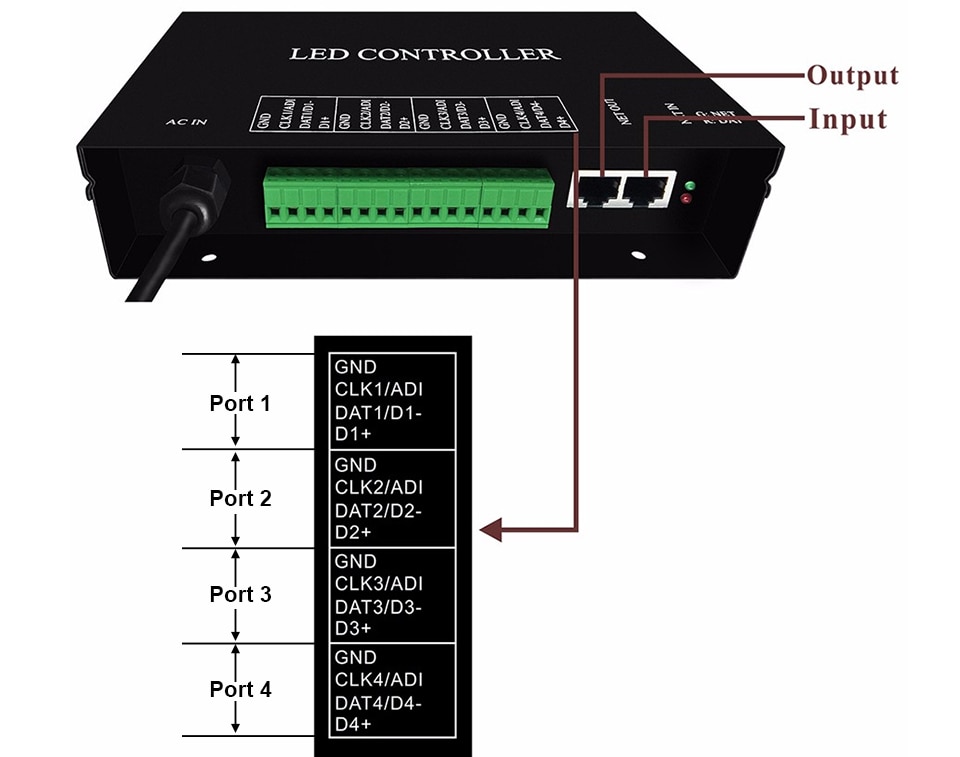
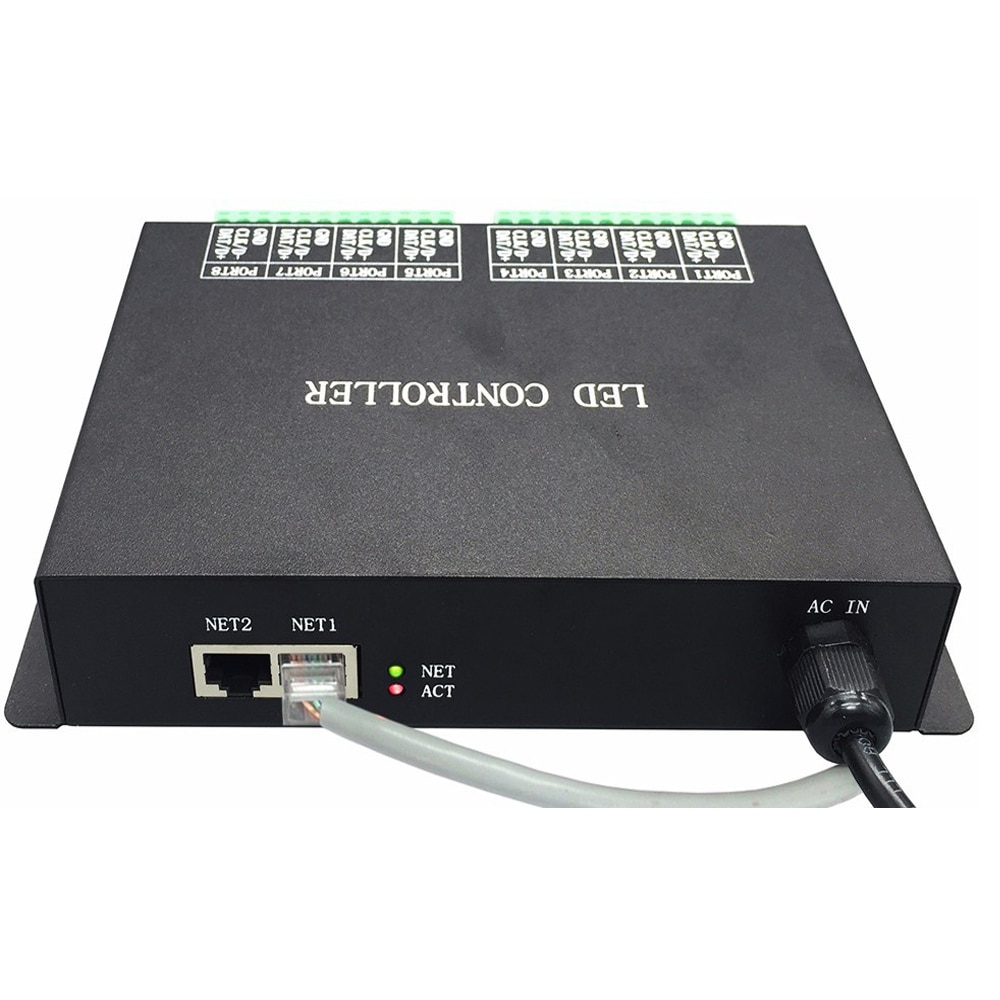
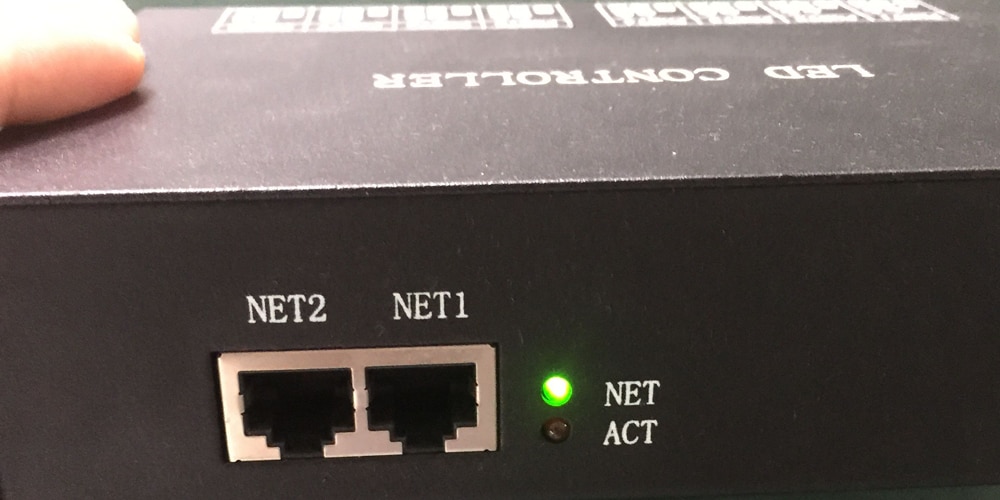
NTEI: input NET2: output
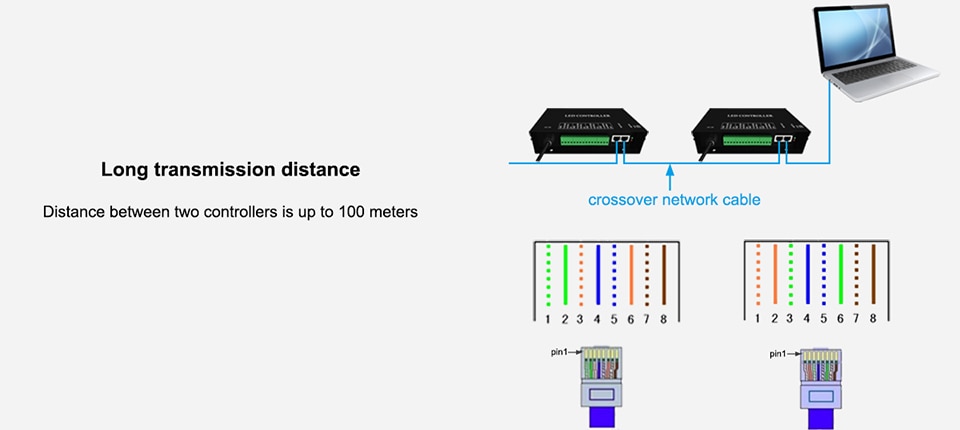
Crossover Network Cable:
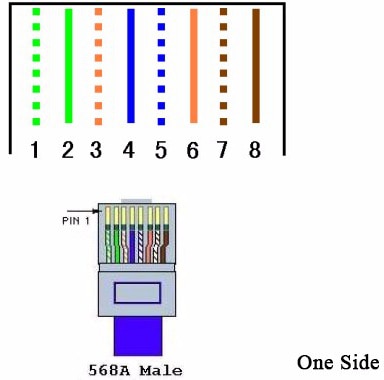
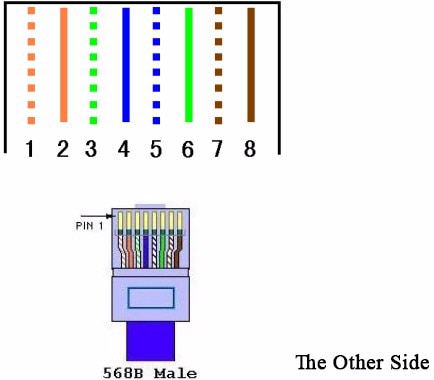
Power on H801RC, green light is on.
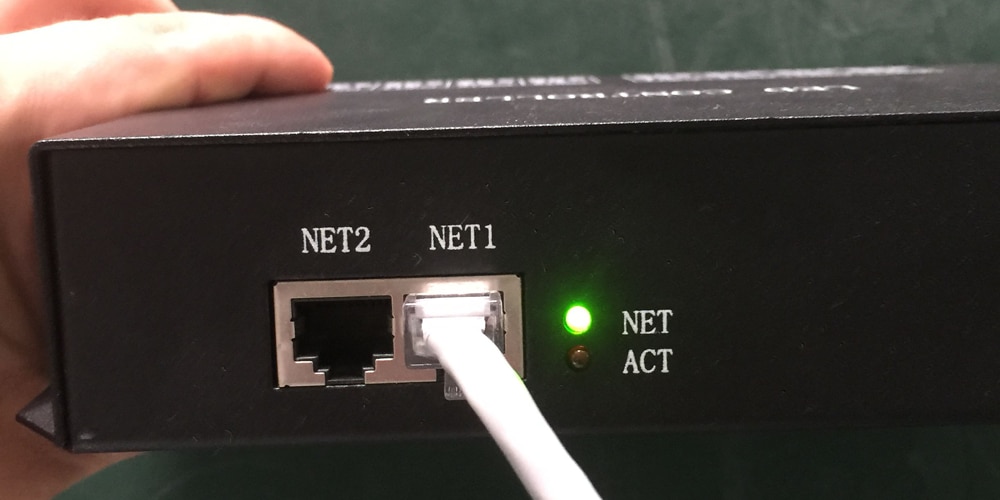
Connect NET1 to computer network interface with RJ45 cable(crossover). Green light is flashing.
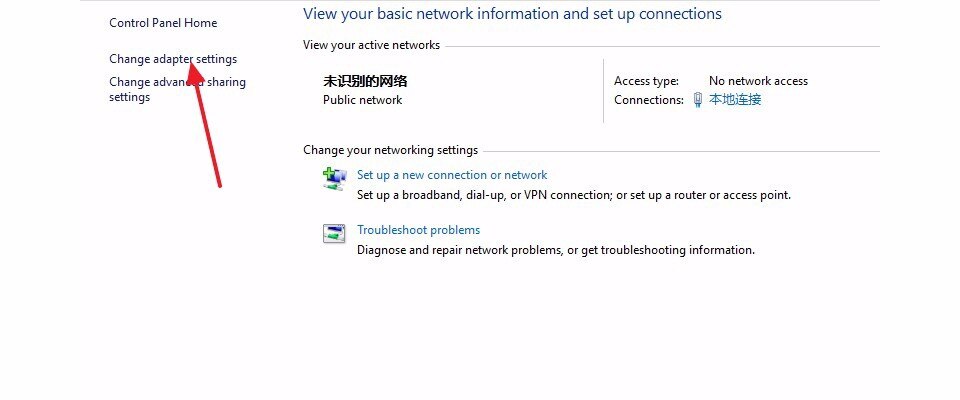
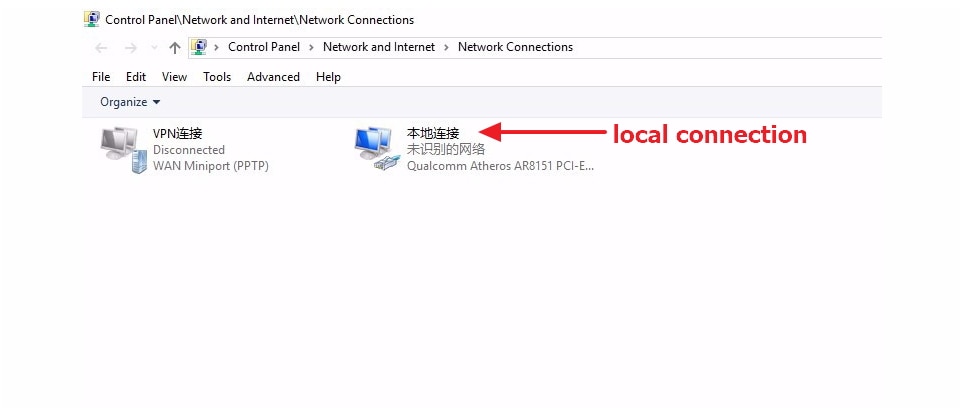
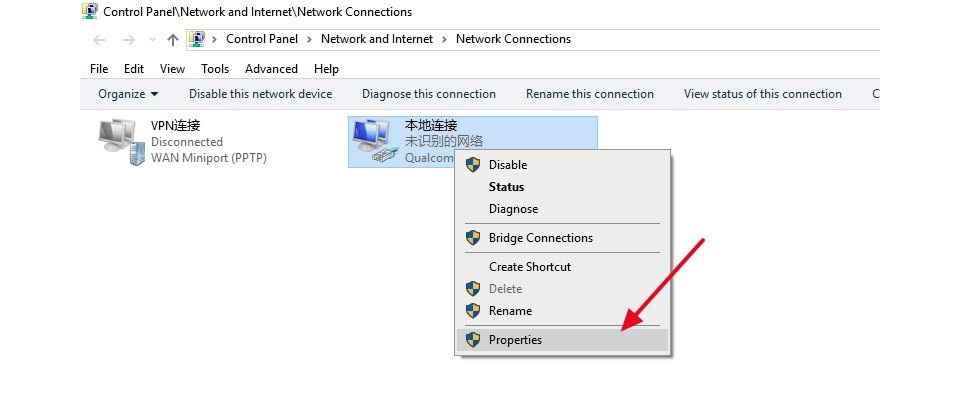
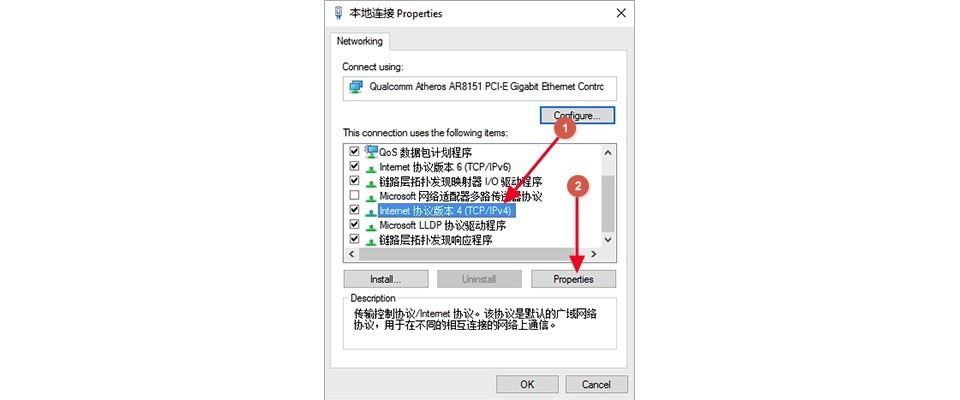
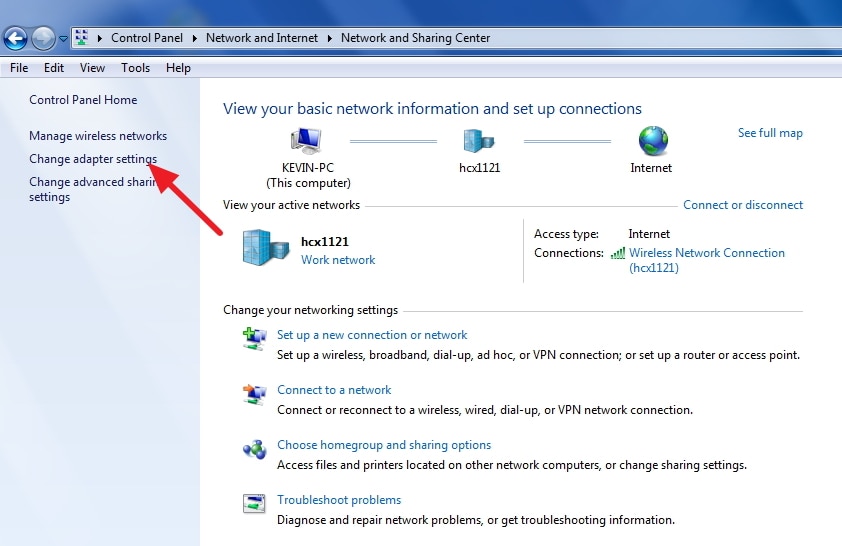
Network and Internet Setting
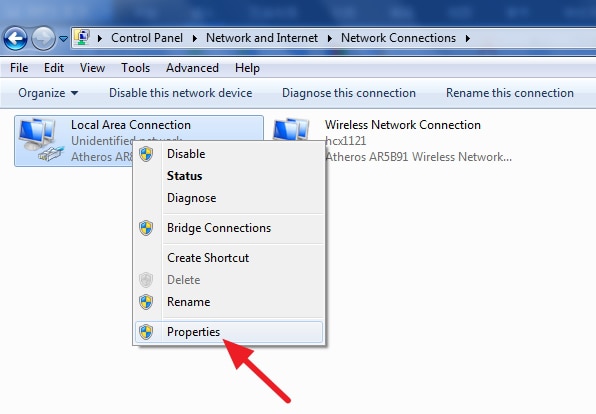
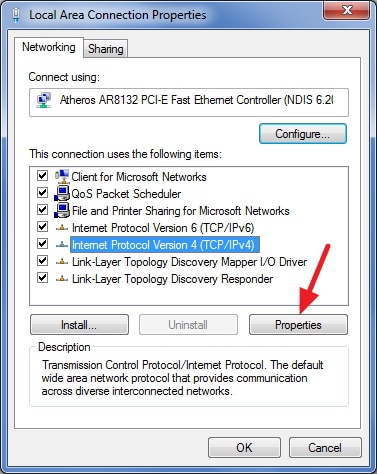
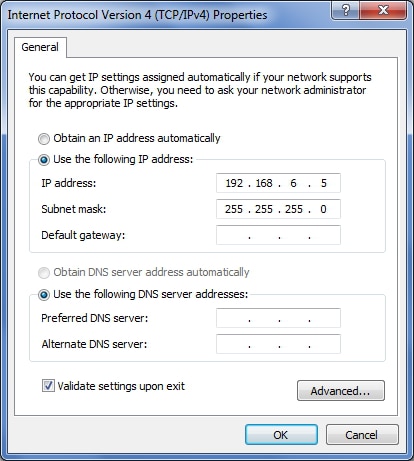
Check the option and enter number exactly the same as the following image displays, then click “OK”.
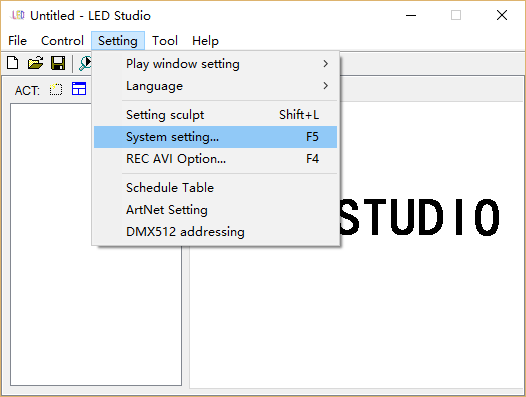
Open “LED Studio Software”, click “setting”-- “system setting”.
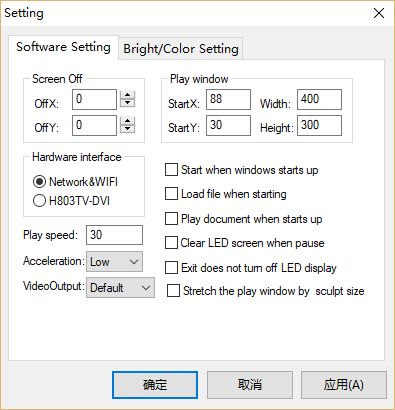
For H801RC, Hardware interface must be “Network&WIFI”, if it’s not, choose “Network&WIFI”, click “Apply”-- “OK”.
Then click “setting”-- “setting sculpt”, password is empty, click “OK” to enter sculpt setting window.
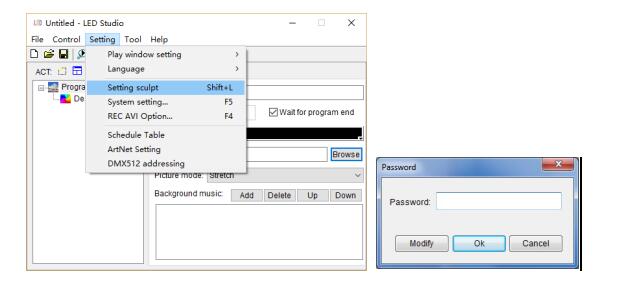
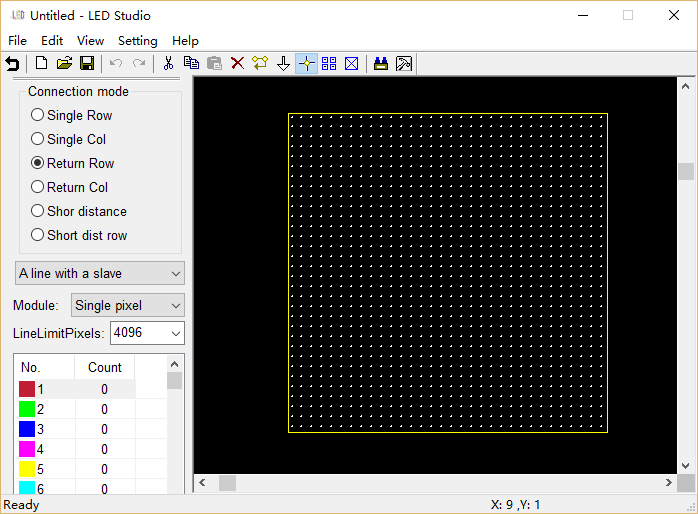
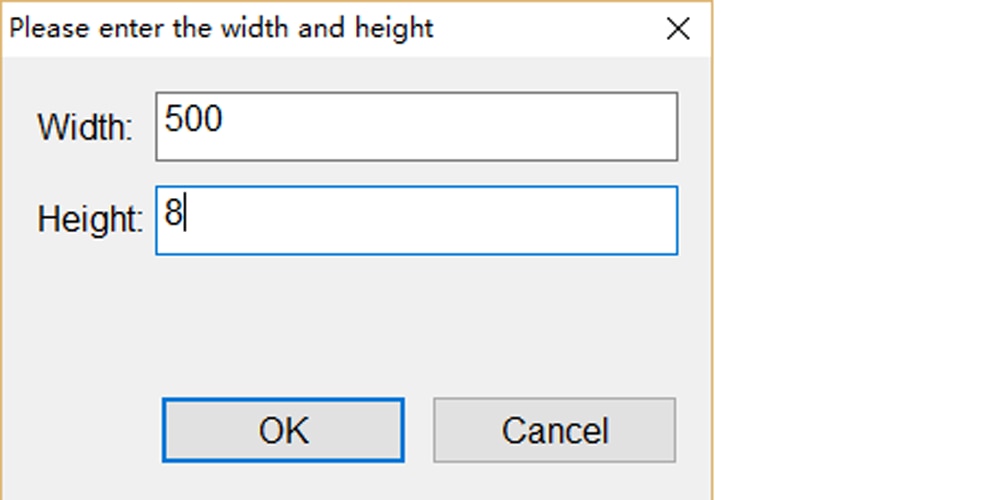
Click “File”-- “New” to create a new sculpt. Unit is pixel. In this example, one H801RC is connected to PC, each port controls 500 pixels.
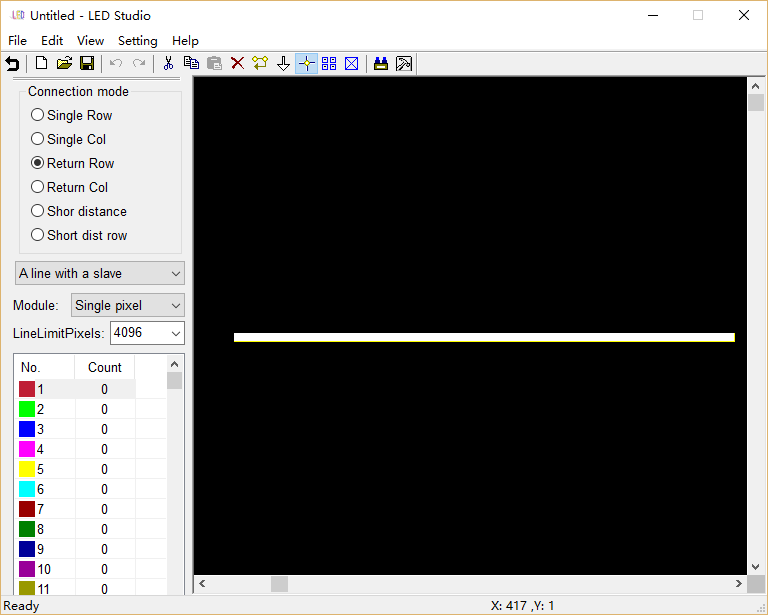
There are pixels added to the sculpt
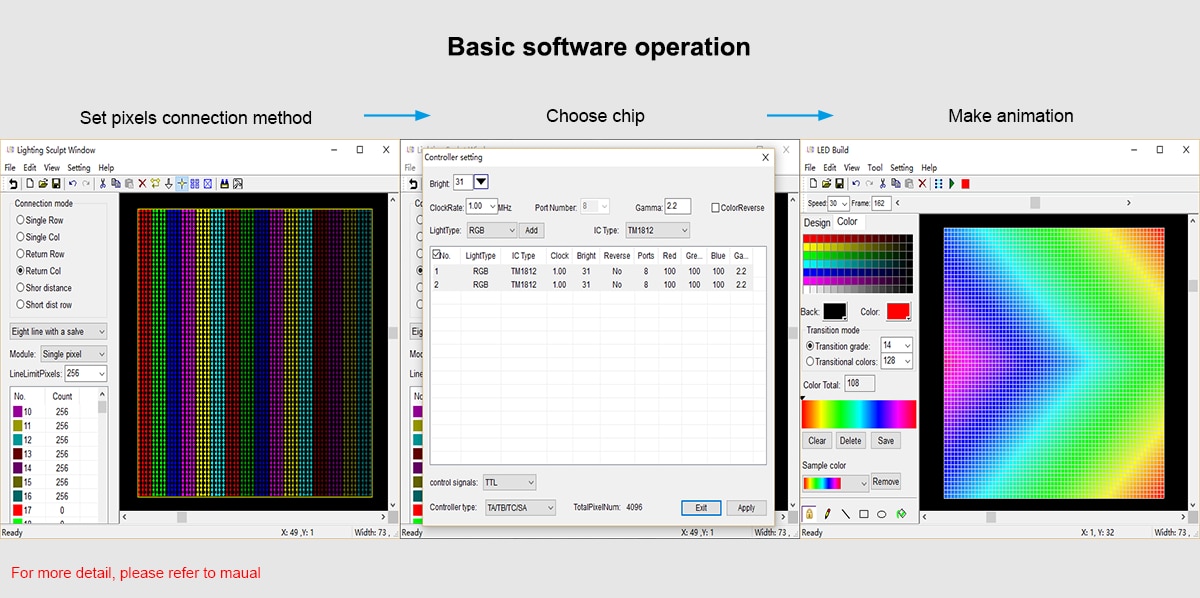
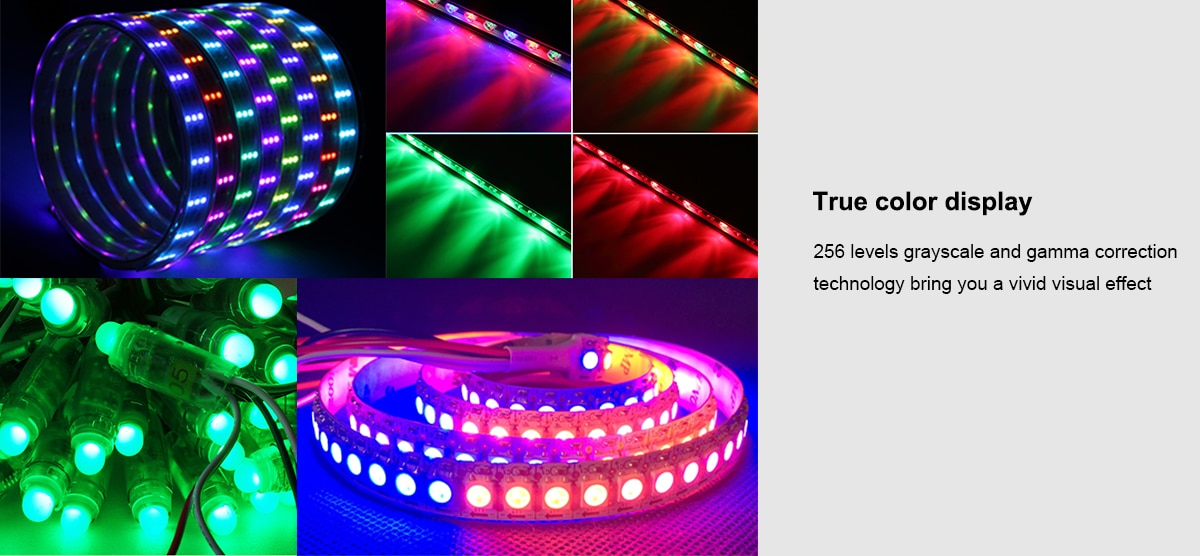
Settings:
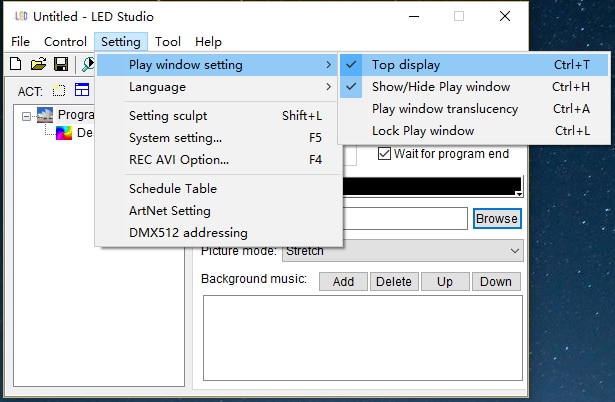
You can set the play window “Top display” so that any other programs won’t effect the play window.
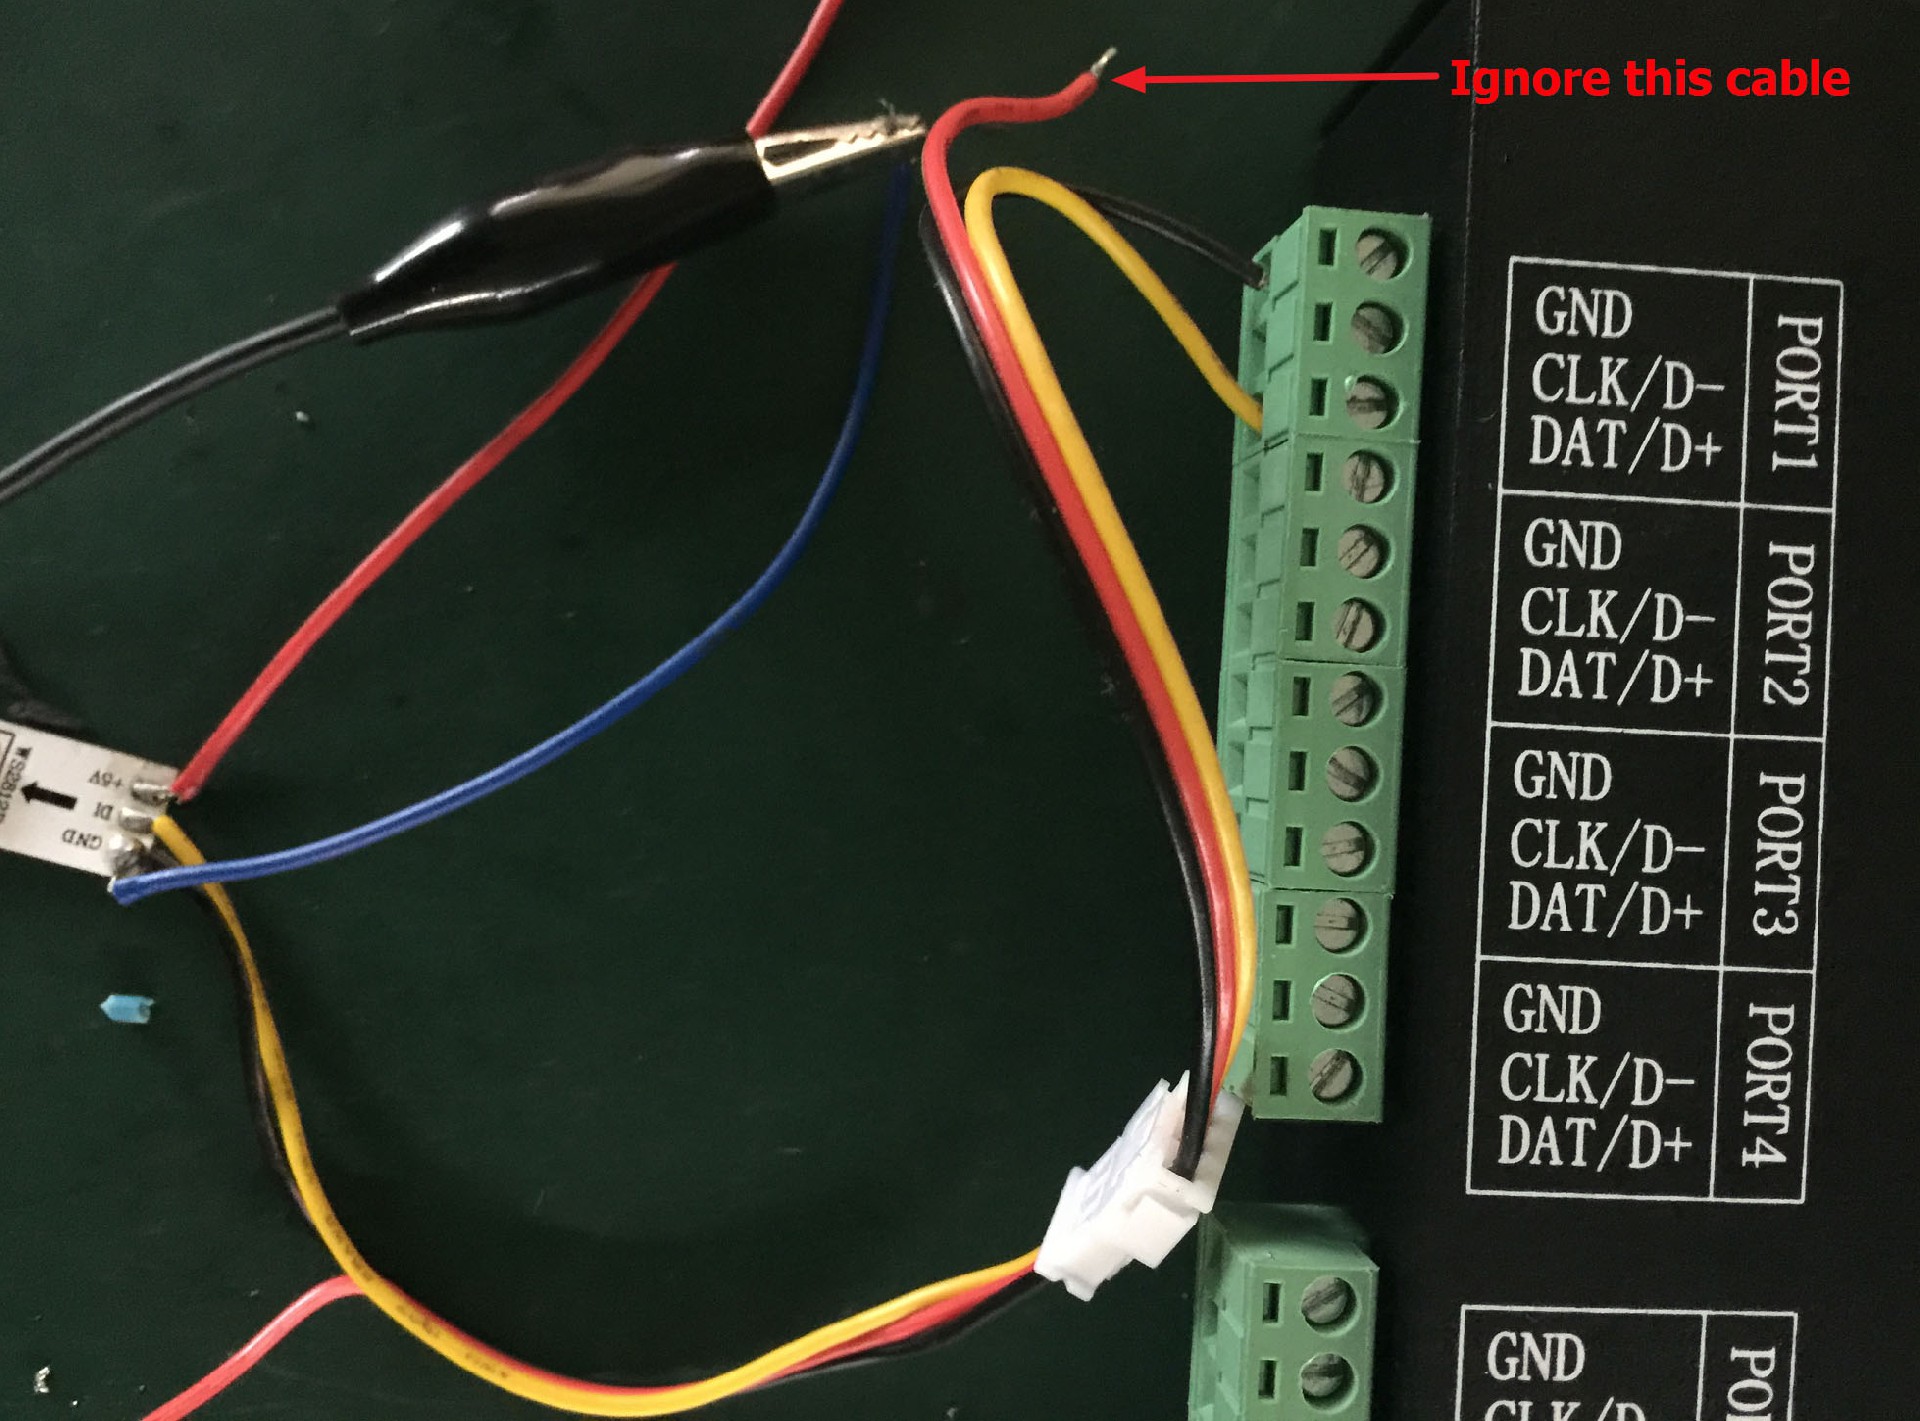
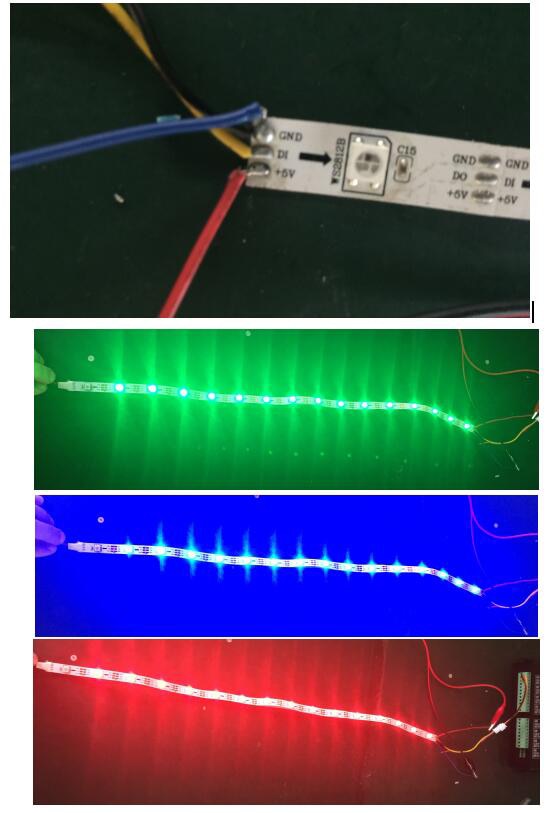
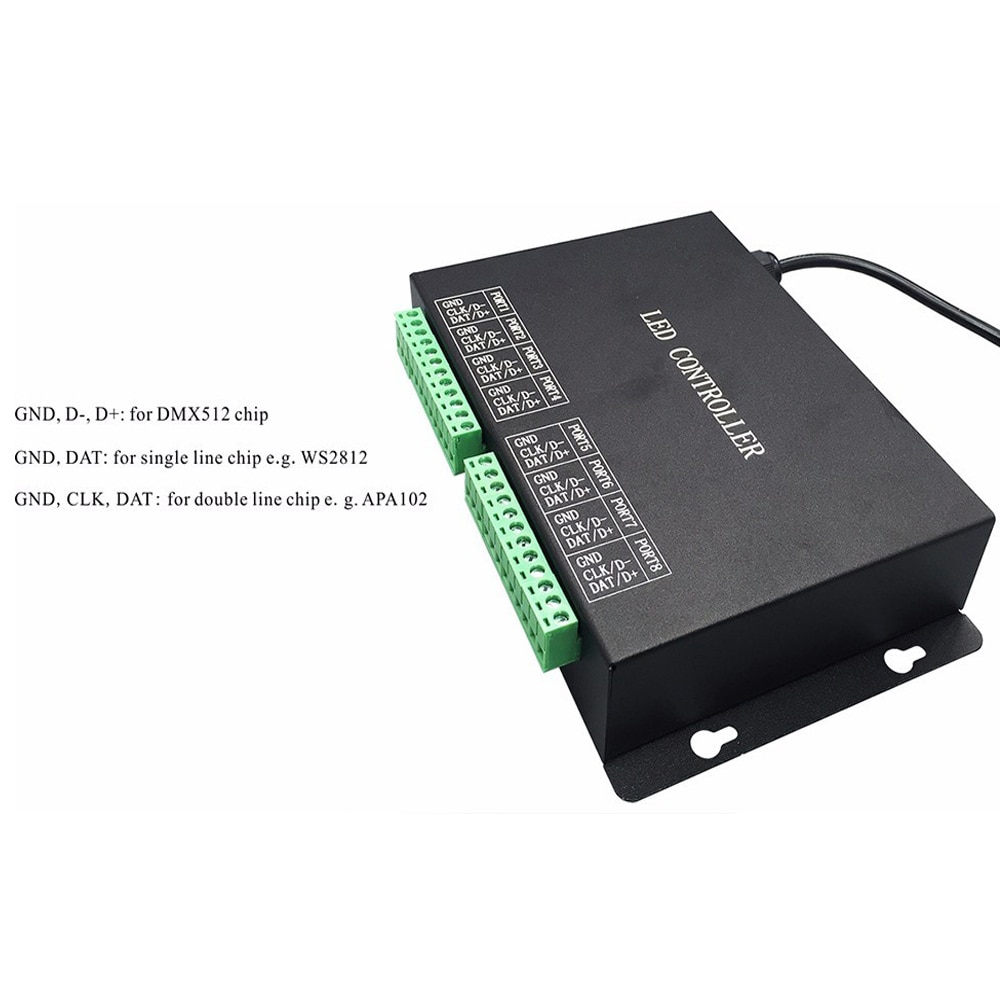
Here i use WS2812 strips for display. For WS2812, you need to connect GND, DAT on controller.
On strip, you can see GND(blue and black), DI(yellow), +5V(red). Black is connected to GND on controller. Blue and red are connected to DC5V power supply. Yellow is connected to DAT on controller.
